Suica is a JavaScript library that provides a minimal, dual, optional and uniform approach to mobile 3D graphics.
Table of contents
Introduction
Suica is a JavaScript library for creating 3D scenes that work or various platforms. Only a browser with a GPU support is needed. Suica is built upon these principles:
-
MINIMAL
Less is more (details). -
DUAL
Scenes can be defined in HTML or in JavaScript. Or in both. -
OPTIONAL
All properties of 2D and 3D graphical objects are optional. -
UNIFORM
Features are consistent across all objects that share them.
Drawing canvas
Suica creates 3D images and animations in a web page. Suica is distributed as suica.js and is loaded via the <script> tag. Once loaded, it scans for HTML tags <suica> and uses them as drawing canvases. Suica does not use JS modules in order to allow easier local development in educational environments.
The general structure of a web page that uses Suica needs a few tags. The tag <script> with attribute src pointing to the Suica library loads and activates Suica. The drawing canvas is defined with <suica> tag inside <body>. The part of the scene that is created in HTML is inside this <suica> tag. The part of the scene that is created with JavaScript commands is inside a separate <script> tag.
<!DOCTYPE html>
<html lang="en">
<head>
   <!-- Loading and activating Suica -->
   <script src="suica.js"></script>
</head>

<body>
   <suica>
      <!-- Suica tags describing a 3D scene -->
   </suica>

   <script>
      // Suica JavaScript code describing 3D scene or animation
   </script>
</body>
</html>
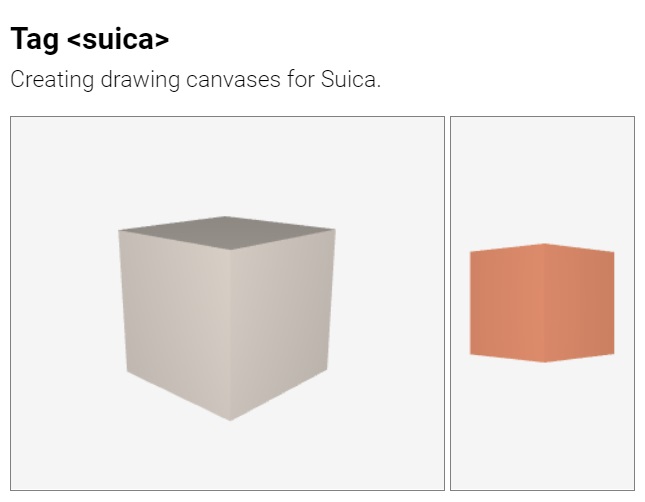
Suica can create 3D object only inside Suica canvas. It is created with HTML tag <suica>.
suica
HTML:
<suica id="𝑠𝑢𝑖𝑐𝑎" width="𝑤𝑖𝑑𝑡ℎ" height="ℎ𝑒𝑖𝑔ℎ𝑡" ...>
Tag and variable. As a tag it defines a 3D drawing canvas. <suica> is the main Suica tag. All other Suica-specific HTML tags are recognized only if used between <suica> and </suica>. The name of the Suica canvas is set in the id attribute. The size of the canvas is set via attributes width and height. Sizes are measured in pixels. The default size is 500×300 pixels. Alternatively, sizes can be set as CSS properties (either inlined or not), which may use any CSS unit.
Example of creating drawing canvases with different sizes:
HTML:
<suica width="400" height="300">

HTML+CSS:
<suica style="width:15em; height:300px;">
The drawing canvas has additional properties, that can be set as HTML attributes of <suica>, as standalone HTML tags inside <suica>...</suica> or as JavaScript commands in <script>...</script>.
As a global variable suica references the last created Suica instance. It is used to access the Suica canvas if it has no name.
newSuica
JS:
newSuica( );
Command. Creates a new 3D drawing canvas as if a <suica> tag is used.
Example of creating а drawing canvas with JavaScript:
JS:
newSuica( );
cube( );
demo( );

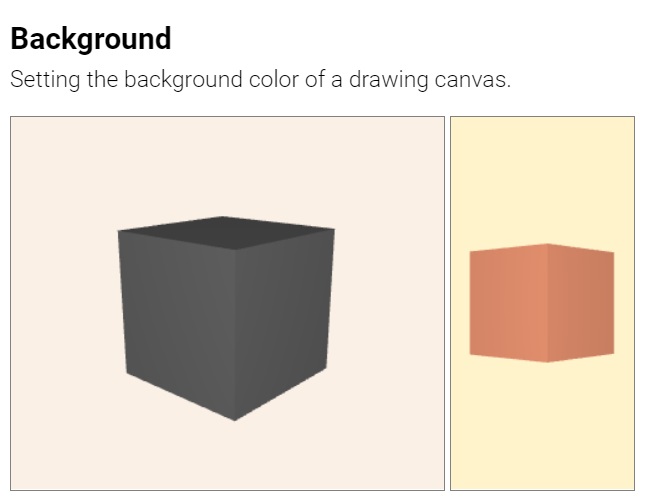
background
HTML:
<suica background="𝑐𝑜𝑙𝑜𝑟">

HTML:
<background color="𝑐𝑜𝑙𝑜𝑟">

HTML+CSS:
<suica style="background:𝑐𝑜𝑙𝑜𝑟;">
CSS:
suica {
   background: 𝑐𝑜𝑙𝑜𝑟;
}
JS:
background( 𝑐𝑜𝑙𝑜𝑟 );
Property and command. Defines the background color of the Suica canvas. It can be set as HTML attribute, CSS style (both inlined and non-inlined), HTML tag and JavaScript function. By default, the background color is white smoke.
HTML/CSS:
<suica background="linen">
<suica style="background: linen;">
<background color="linen">
JS:
background( 'linen' );
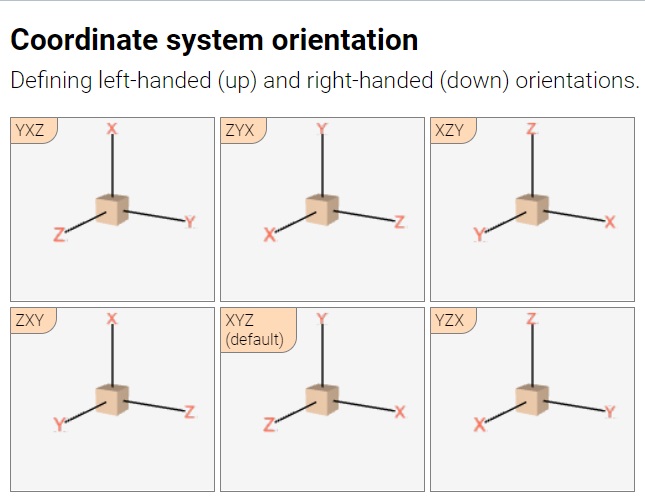
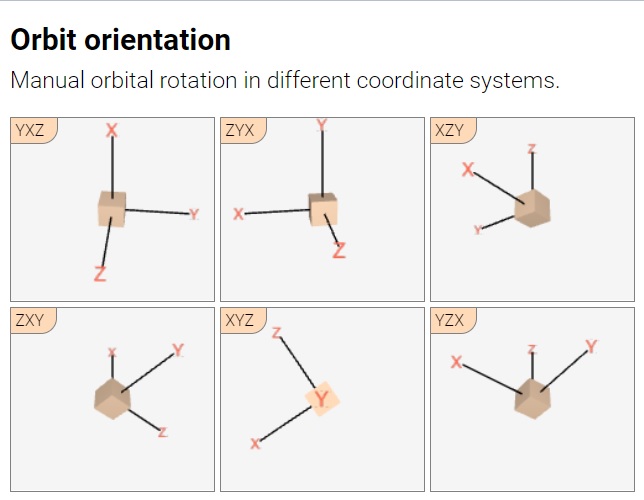
orientation
HTML:
<suica orientation="𝑥𝑦𝑧">
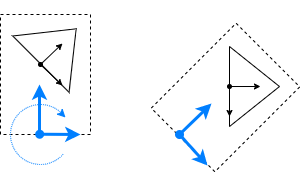
Property. Controls how objects positions and sizes are defined. Suica uses Cartesian 3D coordinate system. The tag <suica> accepts attribute orientation with values XYZ, XZY, YXZ, YZX, ZXY and ZYX (these are all possible permutations of the letters X, Y and Z). Each orientation defines a coordinate system in the following manner:
- the first axis points to the right
- the second axis points upwards
- the third axis point towards the viewer

The default orientation in Suica is XYZ. All examples in this user guide use this orientation, unless explicitly stated that other orientations are used.
HTML:
<suica orientation="xyz">
proactive
HTML:
<suica proactive>
<proactive>
JS:
𝑠𝑢𝑖𝑐𝑎.proactive( );
Property and command. Turns on proactive mode for mouse motion events. These events occur when the mouse pointer is moved over an object, or when an object is moved under the mouse pointer. For details see proactive events.
Creating scenes
Graphical scenes in Suica can be created in HTML or in JavaScript. Independent on how objects are created, they are always visualized in the <suica> tag. The following table compares both approaches. Most of the differences are caused by inherent properties of HTML and JavaScript.
| HTML scenes | JavaScript scenes | |
|---|---|---|
| Application | Static scenes | Static and dynamic scenes |
| Names of entities | Case-insensitive | Case-sensitive |
| Objects | Defined as HTML tags | Defined as JS functions |
| Object properties | Defined as named tag attributes, arbitrary order, any property can e omitted | Defined as anonymous parameters, fixed order, only trailing parameters can be omitted |
| Object modification | Cannot be modified | Can be modified |
HTML definitions are more suitable for static scenes. Objects are declared with HTML tags, and their properties are attributes in these tags. For example, a cube is defined as:
HTML:
<cube center="25,0,15" size="10" color="crimson">
A scene is defined as a sequence of HTML tags for each object in the scene. These tags must be enclosed in the <suica> tag. The following example creates a scene with a cube and a sphere.
HTML:
<suica>
   <cube center="25,0,15" size="10" color="crimson">
   <sphere size="15" color="yellow">
</suica>
Suica does not require that all tags are properly closed. Exceptions are <suica>, <group> and <drawing> tags – they are containers and their exact content is important for Suica. Unclosed tags will make HTML validators scream in horror.
When a scene is defined in JavaScript, all objects are created with functions inside a <script> tag outside the <suica> tag.
HTML/JS:
<suica></suica>
<script>
   cube( [25,0,15], 10, 'crimson' );
   sphere( [0,0,0], 15, 'yellow' );
</script>
JavaScript commands that create object in several canvases can be placed in a single <script> tag.
HTML/JS:
<suica id="a"></suica>
<suica id="b"></suica>
<script>
   a.cube( [25,0,15], 10, 'crimson' );
   b.sphere( [0,0,0], 15, 'yellow' );
</script>
Creating animations
In Suica animations are implemented in JavaScript. Animation in a mobile platform is controlled by browser ticks. For each tick the browser notifies the user application which must provide one frame from the animation. Thus, a motion from point A to point B is split into numerous small steps that eventually end up to B. Each small step is processed individually and separately from all other steps of the motion.

Browsers try to keep ticks at consistent speed, measured in frames per seconds. The result of this approach is that the actual fps can vary and is not guaranteed.
The command demo provides a default system animation. It can be defined in HTML or in JavaScript.
Custom animations in Suica are bound to onTime event – i.e. for each frame the onTime event is generated. If there is event listener, it will be called with two parameters – the current time t and the elapsed time since the previous frame dT.
A typical code that spins a cube in response to onTime event ticks is:
HTML/JS:
<suica ontime="tick">
   <cube id="a">
</suica>

<script>
   function tick( t, dt )
   {
      a.spinV = t;
   }
</script>
It is important to split motion into separate steps. If multiple motions are defined in a single step, they will be merged in a visually single motion. The following example will spin the cube from 0° to 90° but the motion will be invisible to the user. A frame will be created only at the end of tick, when the cube’s spin is 90°, for intermediate angles there will be no frames.
HTML/JS:
<suica ontime="tick">
   <cube id="a">
</suica>

<script>
   function tick( t, dt )
   {
      for( var i=0; i<=90; i++ )
		a.spinV = i;
   }
</script>
Viewing 3D
Suica provides several commands and modes to set and control how a 3D scene is rendered on the drawing canvas. The following table shows how different projections, cameras and canvas sizes can be combined. The default mode for Suica is 3D mode with perspective projection, normal camera and canvas rendering.
| Mode | Projection | Camera | Canvas |
|---|---|---|---|
| 3D mode | Perspective | Normal, stereo or anaglyph | Canvas, window or screen |
| 2D mode | Orthographic | Always normal | Canvas, window or screen |
| VR mode | Always perspective | Always stereo | Always screen |
View point
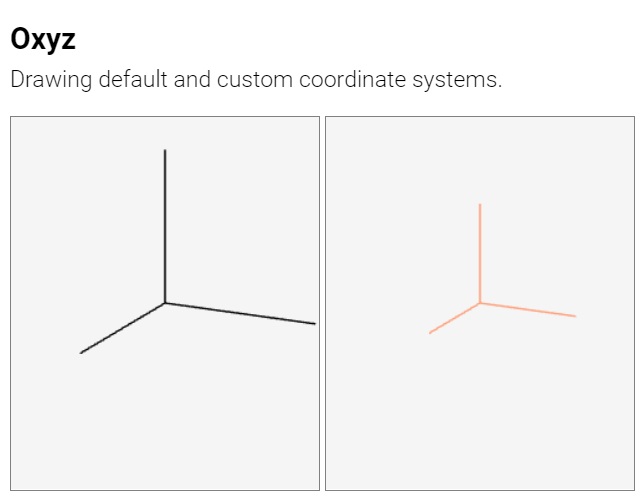
oxyz
HTML:
<oxyz size="𝑠𝑖𝑧𝑒" color="𝑐𝑜𝑙𝑜𝑟">
JS:
oxyz( 𝑠𝑖𝑧𝑒, 𝑐𝑜𝑙𝑜𝑟 );
Command. Visualizes the coordinate system. The coordinate system is an abstract object and it has no graphical representation. The command oxyz visualizes the system as three segments with custom size and color. By default, size is 30 and color is black.
HTML:
<oxyz size="30" color="black">
JS:
oxyz( 30, 'black' );
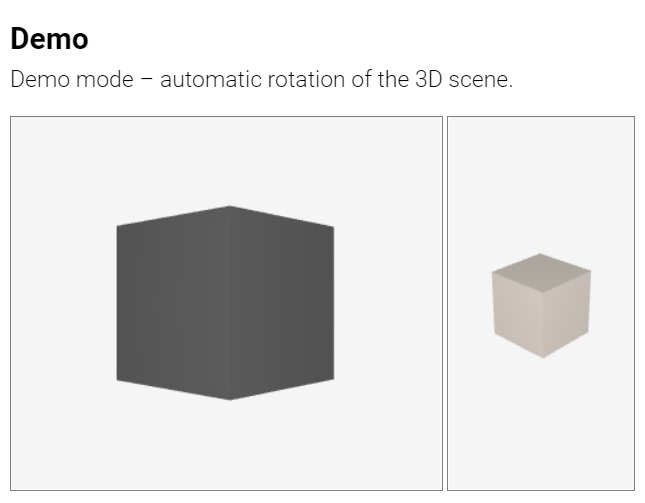
demo
HTML:
<demo distance="𝑑𝑖𝑠𝑡𝑎𝑛𝑐𝑒" altitude="𝑎𝑙𝑡𝑖𝑡𝑢𝑑𝑒" speed="𝘴𝘱𝘦𝘦𝘥">
JS:
demo( 𝑑𝑖𝑠𝑡𝑎𝑛𝑐𝑒, 𝑎𝑙𝑡𝑖𝑡𝑢𝑑𝑒, 𝘴𝘱𝘦𝘦𝘥 );
Command. Turns on demo mode – automatic scene rotation. The parameters distance and altitude define the viewpoint position as distance from the origin of the coordinate system and altitude. By default, distance is 100 and altitude is 30. Parameter speed sets the rotation speed. The default speed is 1 radian per second (i.e. approximately 6.3 seconds for full revolution).
HTML:
<demo distance="100" altitude="30">
JS:
demo( 100, 30 );
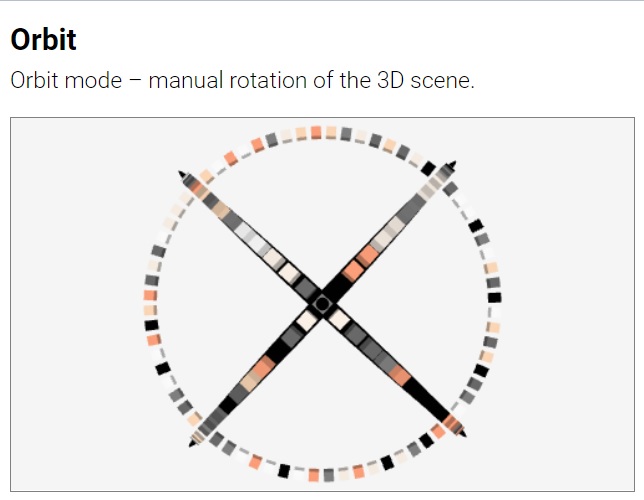
orbit
HTML:
<orbit id="𝑜𝑏𝑗𝑒𝑐𝑡" distance="𝑑𝑖𝑠𝑡𝑎𝑛𝑐𝑒" altitude="𝑎𝑙𝑡𝑖𝑡𝑢𝑑𝑒" speed="𝘴𝘱𝘦𝘦𝘥" ...>
JS:
𝑜𝑏𝑗𝑒𝑐𝑡 = orbit( 𝑑𝑖𝑠𝑡𝑎𝑛𝑐𝑒, 𝑎𝑙𝑡𝑖𝑡𝑢𝑑𝑒, 𝘴𝘱𝘦𝘦𝘥 );
Command and object. Turns on orbit mode – interactive rotation of the scene around the second axis of the orientation. The parameters distance and altitude define the viewpoint position as distance from the origin of the coordinate system and altitude. By default, distance is 100 and altitude is 30. Parameter speed sets the rotation speed. The default speed is 1 radian per second (i.e. approximately 6.3 seconds for full revolution). These parameters are not properties of orbit, i.e. they do not exist in the object.
HTML:
<orbit distance="100" altitude="30">
JS:
orbit( 100, 30 );
| Interactivity | Mouse | Keys | Touch |
|---|---|---|---|
| orbiting | left button | one-finger move | |
| zooming | middle button or mousewheel | two-finger spread or squish | |
| panning | right button or left button + ctrl/alt/shiftKey | arrow keys | two-finger move |
Although orbit is a command, it can be used as an object. In this case the object is not a Suica object, but an instance of Three.js’s OrbitControls. When defined in HTML some of the properties are available as attributes (zooming: enableZoom, maxDistance, minDistance, maxZoom, minZoom, zoomSpeed; orbiting: autoRotate, autoRotateSpeed, enableRotate, rotateSpeed, maxAzimuthAngle, minAzimuthAngle, maxPolarAngle, minPolarAngle; panning: enablePan, panSpeed, keyPanSpeed, screenSpacePanning; general: enabled, enableDamping, dampingFactor). Modification of properties can be done only in JavaScript.
HTML:
<orbit distance="100" maxDistance="300" minDistance="10">
JS:
a = orbit( 100 );
a.maxDistance = 300;
a.minDistance = 10;
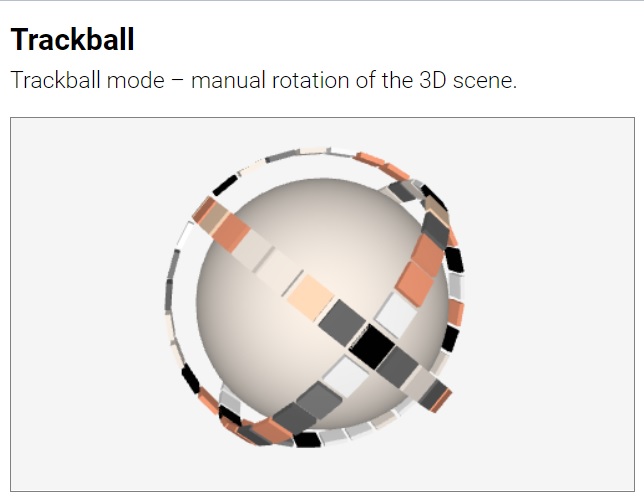
trackball
HTML:
<trackball id="𝑜𝑏𝑗𝑒𝑐𝑡" distance="𝑑𝑖𝑠𝑡𝑎𝑛𝑐𝑒" altitude="𝑎𝑙𝑡𝑖𝑡𝑢𝑑𝑒" ...>
JS:
𝑜𝑏𝑗𝑒𝑐𝑡 = trackball( 𝑑𝑖𝑠𝑡𝑎𝑛𝑐𝑒, 𝑎𝑙𝑡𝑖𝑡𝑢𝑑𝑒 );
Command and object. Turns on trackball mode – interactive rotation of the scene unrestricted by the axes. The parameters distance and altitude define the viewpoint position as distance from the origin of the coordinate system and altitude. By default, distance is 100 and altitude is 30. These parameters are not properties of trackball, i.e. they do not exist in the object.
HTML:
<trackball distance="100" altitude="30">
JS:
trackball( 100, 30 );
| Interactivity | Mouse | Touch |
|---|---|---|
| rotating | left button | one-finger move |
| zooming | middle button or mousewheel | two-finger spread or squish |
| panning | right button | two-finger move |
Although trackball is a command, it can be used as an object. In this case the object is not a Suica object, but an instance of Three.js’s TrackballControls. When defined in HTML some of the properties are available as attributes (zooming: maxDistance, minDistance, zoomSpeed, noZoom; rotating: rotateSpeed, noRotate; panning: panSpeed, noPan, general: enabled, dynamicDampingFactor, staticMoving). Modification of properties can be done only in JavaScript.
HTML:
<trackball distance="100" maxDistance="300" minDistance="10">
JS:
a = trackball( 100 );
a.maxDistance = 300;
a.minDistance = 10;
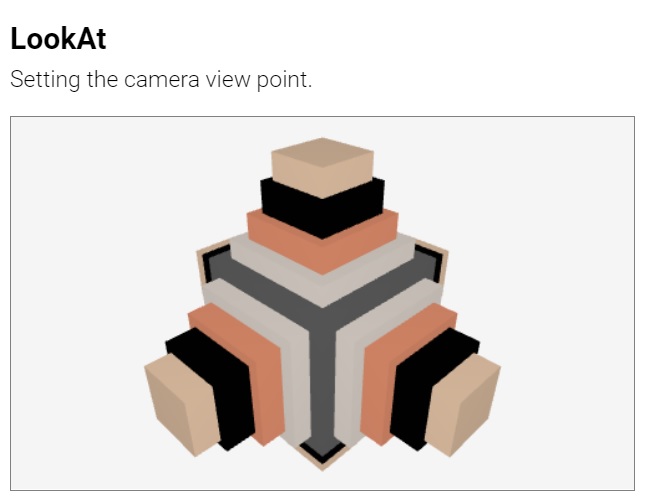
lookAt
HTML:
<lookat from="𝑓𝑟𝑜𝑚" to="𝑡𝑜" up="𝑢𝑝">
JS:
lookAt( 𝑓𝑟𝑜𝑚, 𝑡𝑜, 𝑢𝑝 );
Command. Defines the viewing position and orientation. The command lookAt takes three parameters: from is a 3D location for the viewing position (the camera is placed there), to is a 3D position of the viewing target (the camera is facing it), and up is a vector defining the head orientation (the direction that is considered upwards). By default, the target position is (0,0,0), and the up direction corresponds to the up axis of the coordinate system.
HTML:
<lookat from="100,10,50">
<lookat from="100,10,50" to="0,0,10" up="1,0,0">
JS:
lookAt( [100,10,50] );
lookAt( [100,10,50], [0,0,10], [1,0,0] );
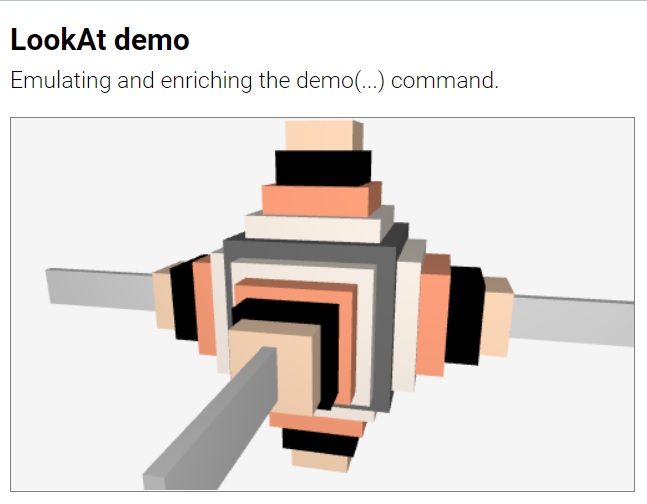
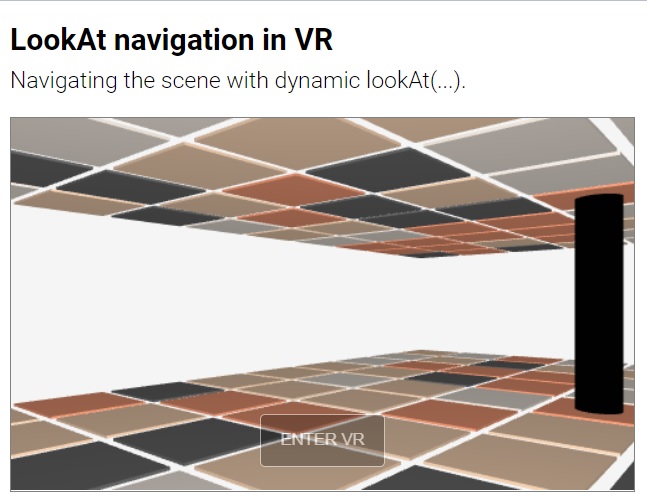
The command demo can be simulated and enriched by lookAt – i.e. adding dynamic change of distance and elevation to the default rotation.
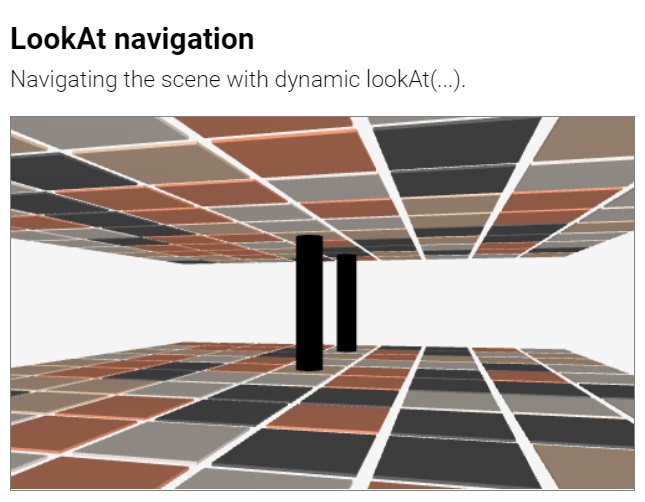
To implement a navigation (walking or flying) in a 3D scene the viewing position must be modified in the animation loop.
Projections
A projection is required to visualize a 3D shape onto a 2D screen. Suica supports two types of projections: perspective and orthographic. By default, perspective is used.
perspective
HTML:
<suica perspective="𝑛𝑒𝑎𝑟,𝑓𝑎𝑟,𝑓𝑜𝑣">
<perspective near="𝑛𝑒𝑎𝑟" far="𝑓𝑎𝑟" fov="𝑓𝑜𝑣">
JS:
perspective( 𝑛𝑒𝑎𝑟, 𝑓𝑎𝑟, 𝑓𝑜𝑣 );
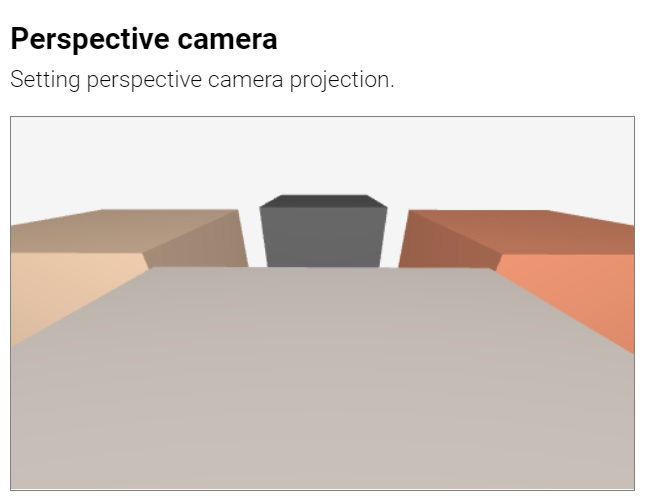
Property and command. Sets a perspective camera projection. Objects further away appear smaller. The perspective is defined by near distance, far distance and field of view angle.
The near and far distances (by default 1 and 1000) define the depth span of the viewing area. Objects and part of objects outside this area are not drawn. The field of view angle is measured in degrees (by default 40°) and it defines the vertical span of the viewing area. Smaller angles make objects appear bigger and reduce the perspective effect; larger angles make objects appear smaller and increases the perspective effect.
A valid perspective requires that 0<near<far and 0°<field of view<180°.
HTML:
<suica perspective>
<suica perspective="1,1000,40">
JS:
perspective( );
perspective( 1, 1000, 40 );
orthographic
HTML:
<suica orthographic="𝑛𝑒𝑎𝑟,𝑓𝑎𝑟">
<orthographic near="𝑛𝑒𝑎𝑟" far="𝑓𝑎𝑟">
JS:
orthographic( 𝑛𝑒𝑎𝑟, 𝑓𝑎𝑟 );
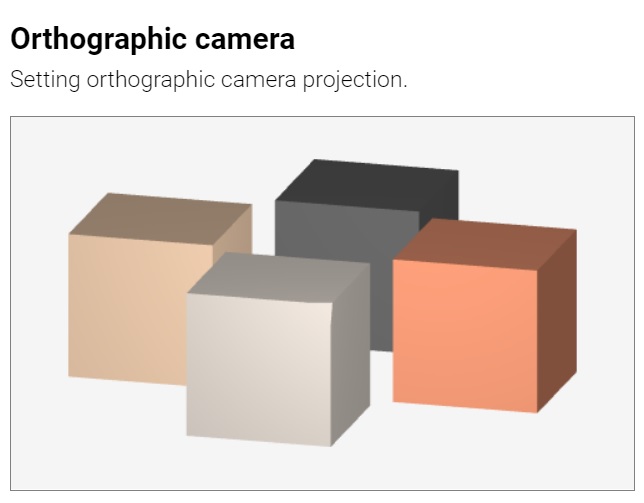
Property and command. Sets an orthographic camera projection. Objects do not change their visual size depending on how close or distant they are. The orthographic camera is defined by near and far distances. By default, they are 0 and 1000; and they define the depth span of the viewing area. Objects and part of objects outside this area are not drawn.
A valid orthographic projection requires that 0≤near<far.
HTML:
<suica orthographic>
<suica orthographic="0,1000">
JS:
orthographic( );
orthographic( 0, 1000 );
Canvases
Suica always draws only inside the <suica> tag. The size of the drawing canvas determines the size of the generated visuals. Although this size can be controlled via CSS and JavaScript, Suica provides a quick way to switch into full window and full screen.

fullWindow
HTML:
<suica fullwindow>
<fullwindow>
JS:
fullWindow( );
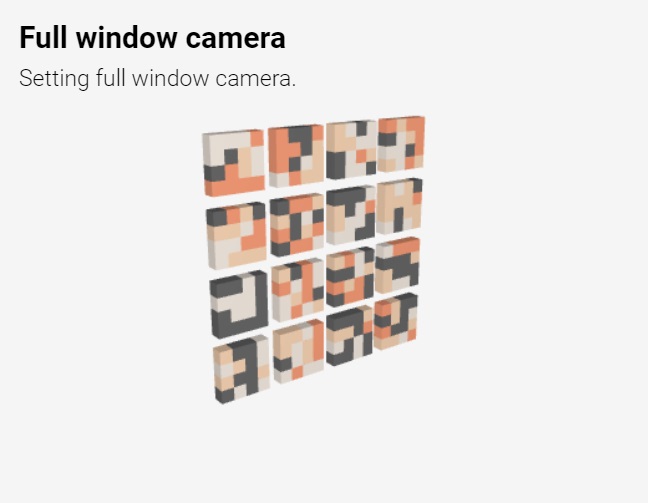
Property and command. Sets the size of the drawing canvas to match the size of the browser’s window.
fullScreen
HTML:
<suica fullscreen>
<fullscreen>
JS:
fullScreen( );
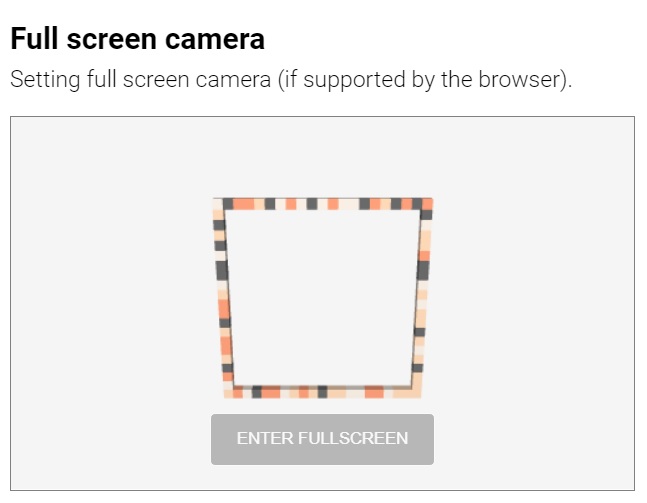
Property and command. Asks Suica to go into full screen mode. Using full screen mode adds a button at the bottom of the canvas. If the button says [ENTER FULLSCREEN] the user must click it to enter full screen mode. If full screen is not supported, the button says [FULLSCREEN NOT SUPPORTED].
To exit full screen mode press Esc or follow the browser’s instruction shown at the time of activating the mode.
Cameras
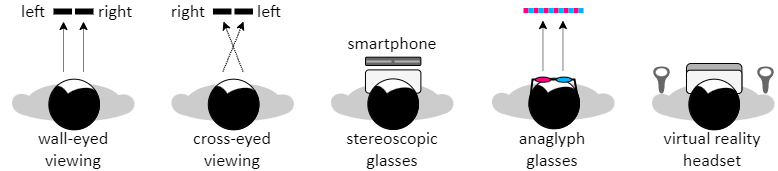
Suica supports several virtual stereo cameras. They split the image of the scene into two images – one for the left eye and another one for the right eye. Both images are then combined into a single image, shown on the screen. Viewing such stereo images requires additional hardware like 3D glasses or special viewing techniques like cross-eyed viewing.
The stereo camera implements wall-eyed and cross-eyed viewing, as well as stereoscopic glasses that use user’s smartphone as screen. The anaglyph camera produces images for anaglyph red-cyan glasses. The vr camera can be used only with VR headsets.
stereo
HTML:
<suica stereo="𝑑𝑖𝑠𝑡𝑎𝑛𝑐𝑒">
<stereo distance="𝑑𝑖𝑠𝑡𝑎𝑛𝑐𝑒">
JS:
stereo( 𝑑𝑖𝑠𝑡𝑎𝑛𝑐𝑒 );
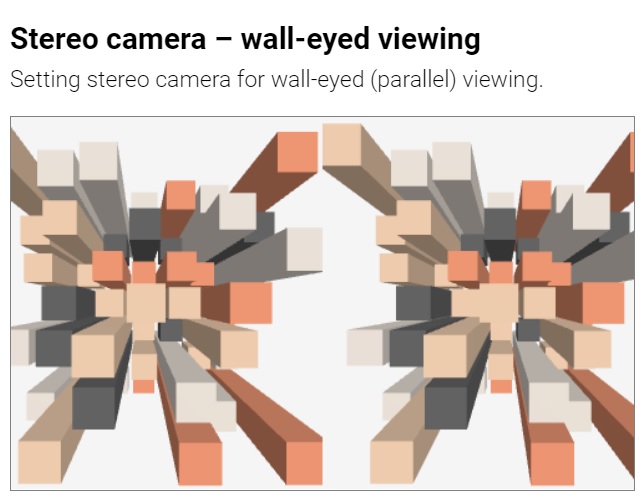
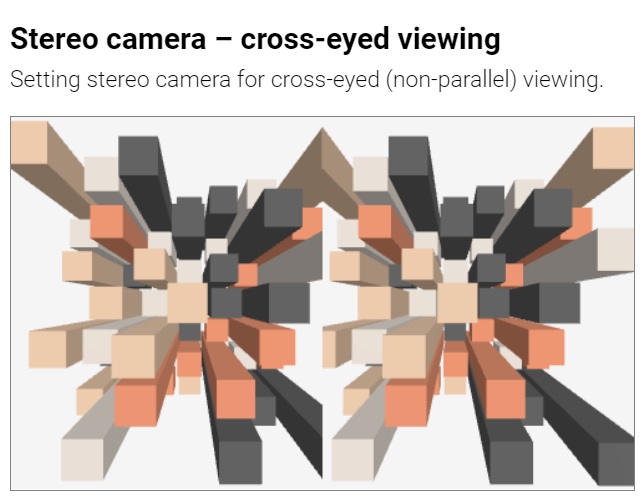
Property and command. Sets a stereo camera. The scene is drawn twice – side-by-side, once for each of the eyes. The stereo effect is controlled by distance parameter, which determines the stereo effect. By default, it is 5. Values closer to 0 decreases the stereo effect.
Both positive and negative distances are allowed. Positive distances correspond to wall-eyed viewing or viewing with a smartphone and low-end stereoscopic glasses. Negative distances swap left and right images and correspond to cross-eyed viewing.
HTML:
<suica stereo>
<suica stereo="1">
<suica stereo="-1">
JS:
stereo( );
stereo( 1 ); // wall-eyed
stereo( -1 ); // cross-eyed
anaglyph
HTML:
<suica anaglyph="𝑑𝑖𝑠𝑡𝑎𝑛𝑐𝑒">
<anaglyph distance="𝑑𝑖𝑠𝑡𝑎𝑛𝑐𝑒">
JS:
anaglyph( 𝑑𝑖𝑠𝑡𝑎𝑛𝑐𝑒 );
Property and command. Sets an anaglyph stereo camera. The scene is projected twice with different colors, suited for red-cyan glasses. The anaglyph effect is controlled by the distance parameter, which determines the focal distance. By default, it is 5. Smaller values will increase the anaglyphic effect, larger values will decrease it.
HTML:
<suica anaglyph>
<suica anaglyph="5">
JS:
anaglyph( );
anaglyph( 5 );

vr
HTML:
<suica vr>
<vr>
JS:
vr( );
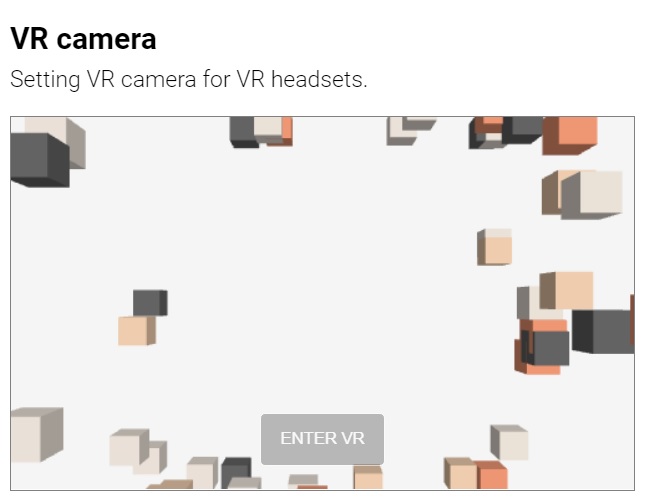
Property and command. Allows Suica to go into immersive 3D environment. Using a VR stereo camera adds a button at the bottom of the canvas. If the button says [ENTER VR] the user must click it to enter VR mode. If VR is not supported, the button says [VR NOT SUPPORTED].
Currently the VR camera in Suica does not provide access to the controllers. Also, VR mode is not supported when the HTML file is loaded locally from file:.
HTML:
<suica vr>
JS:
vr( );
Constants
SUICA_VERSION
JS:
SUICA_VERSION
Constant. A string formatted as major.minor.build, e.g. 2.0.5:
- major is the major Suica version (currently it is 2),
- minor is the minor Suica version (currently it is 0),
- build is the build number, it is incremented whenever a new
suica.jsis generated.
SUICA_DATE
JS:
SUICA_DATE
Constant. A string with the date and time of generating suica.js, e.g. 03-Nov-22 21:16.
General functions
radians
JS:
radians( 𝑑𝑒𝑔𝑟𝑒𝑒𝑠 );
Function. Converts degrees into radians.
JS:
rad = radians( 120 );
degrees
JS:
degrees( 𝑟𝑎𝑑𝑖𝑎𝑛𝑠 );
Function. Converts radians into degrees.
JS:
deg = degrees( 3.14159 );
lerp
JS:
lerp( 𝑓𝑖𝑟𝑠𝑡, 𝑠𝑒𝑐𝑜𝑛𝑑, 𝑘 );
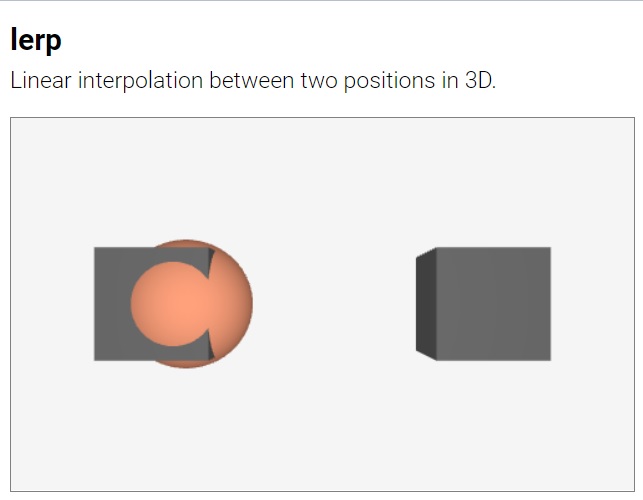
Function. Calculates linear interpolation between two positions first position
or object and second position or object. The coefficient of interpolation is k.
When k is 0, the first position is returned, when k is 1, the second position
is returned. When k is between 0 and 1 an intermediate position is returned.
JS:
mid = lerp( sphereA, sphereB, 0.5 );
clamp
JS:
clamp( value, min, max );
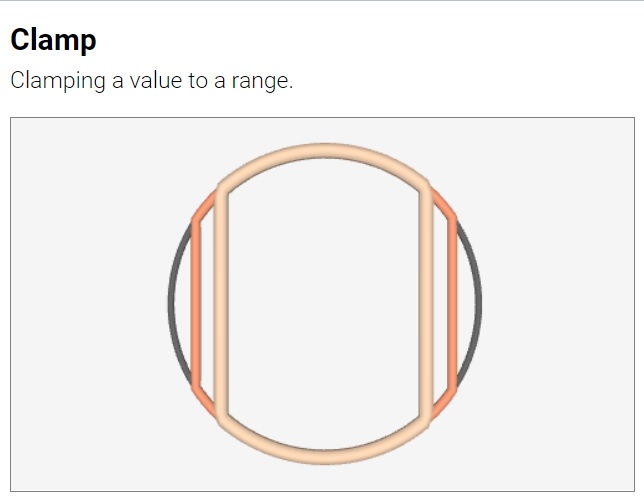
Function. Restricts or clamps numeric value to the range [min,max].
JS:
x = clamp( x, -1, 1 );
Random functions
random
JS:
random( from, to );
random( [a, b, c, ...] );
Function. Generates a pseudo-random floating-point number in a range or picks a random value from an array of values.
JS:
a = random( 5, 10 ); // from 5 to 10
a = random( [1, 2, 3, 4] ); // from the list
To generate a fixed user-dependent sequence of pseudo-random values use scorm.derandomize.
randomIn
JS:
randomIn( object );
Function. Generates a random point inside an obeject. This function calls the randomIn method of the object.
JS:
point( randomIn(box) );
randomOn
JS:
randomOn( 𝑜𝑏𝑗𝑒𝑐𝑡 );
Function. Generates a random point on the boundary of an obeject. This function calls the randomOn method of the object.
JS:
point( randomOn(box) );
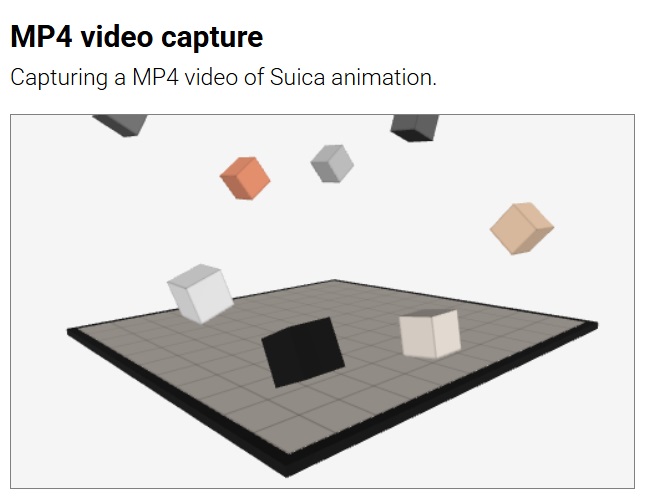
Video capturing
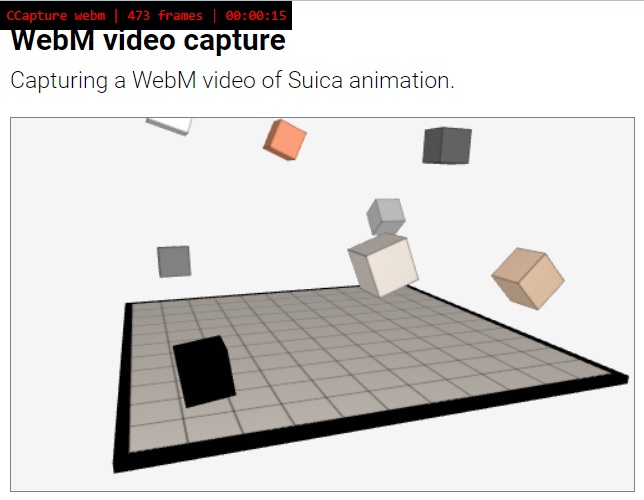
Suica provided internal mechanism for recording Suica animations into WebM or MP4 files.
capture
JS:
capture( 𝘴𝘳𝘤, 𝘵𝘪𝘮𝘦, 𝘧𝘱𝘴, 𝘧𝘰𝘳𝘮𝘢𝘵, 𝘴𝘬𝘪𝘱𝘛𝘪𝘮𝘦 );
HTML:
<capture src="𝘴𝘳𝘤" time="𝘵𝘪𝘮𝘦" fps="𝘧𝘱𝘴" format="𝘧𝘰𝘳𝘮𝘢𝘵" skipTime="𝘴𝘬𝘪𝘱𝘛𝘪𝘮𝘦">
Function. Initiates video capturing. Parameter src provides the name of the video file. If src is an empty string '' the name is automatically generated from the name of the HTML file that runs the code. The desired duration of the video is time seconds at fps frames per seconds. By default, they are set to 10 seconds and 30 fps. When format is webm then capture creates a WebM video file; if it is mp4 – a MP4 video file. Parameter skipTime defines the number of seconds to skip before starting capturing. This is used when the scene is not ready at the time of initiating video capture.
JS:
capture( );
capture( 'myfile', 10, 30 );
capture( 'anigif', 10, 30, 'mp4' );
HTML:
<capture>
<capture src="myfile" time="10" fps="30">
<capture src="anigif" format="mp4">
The videos created by these two examples are: webm and mp4.
Note that not all browsers support capturing as MP4 and WebM. The following list shows some more detailed formats:
video/webm; codecs=vp8– WebM with VP8 video codec, widely supportedvideo/webm; codecs=vp9– WebM with VP9, more efficient but less universalvideo/webm; codecs=h264– WebM with H.264, less commonvideo/mp4; codecs=h264– MP4 with H.264, supported in some browsers like Safarivideo/mp4; codecs=av1– MP4 with AV1, emerging support in newer browsersvideo/x-matroska; codecs=avc1– Matroska container with H.264, rare
Questions and answers
- How to change the attribute of an object created in HTML?
- How to change the center of an object in respect to the object?
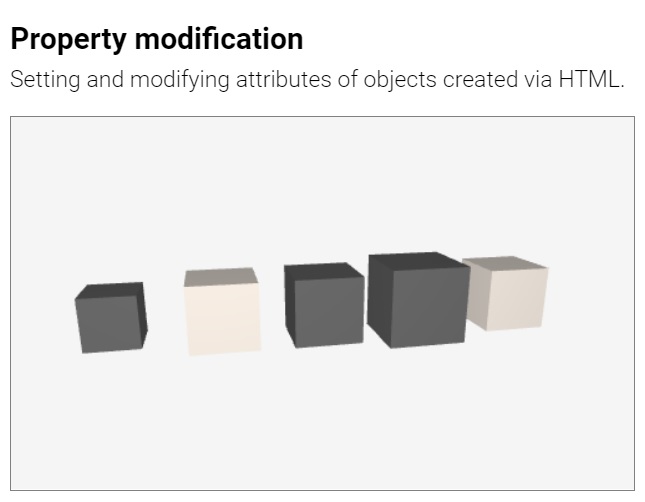
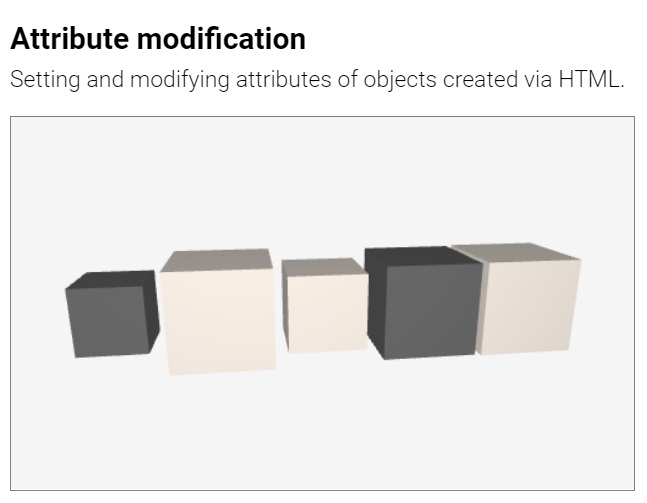
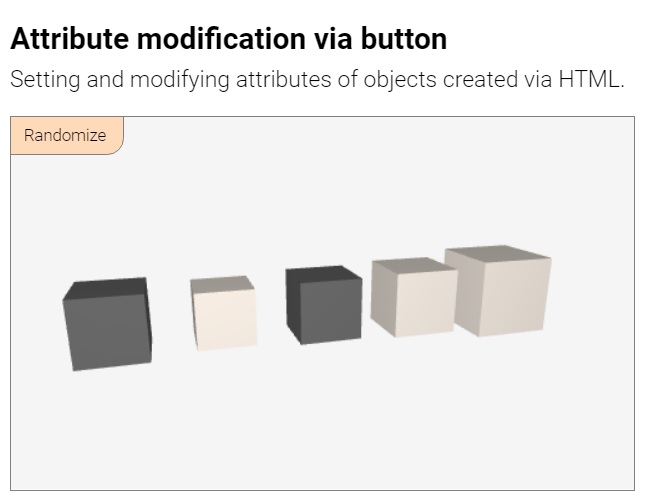
How to change the attribute of an object created in HTML?
The preferred way is to create the object with a name in attribute id. Suica will create a global variable with that name, which can be modified. The alternative way is to modify the attribute itself with a string value.
HTML:
<cube id="a">
JS:
// using object properties
a.size = 10;

// using tag attributes
cube = document.getElementsByTagName( 'cube' )[0];
cube.setAttribute( 'size', 10 );
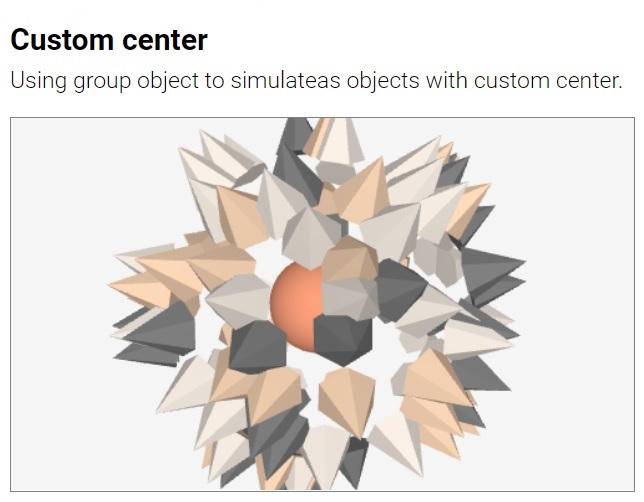
How to change the center of an object in respect to the object?
The center of an object is important point as translation, scaling and rotation is done in respect to the center. To define a custom center of an object it can be put in a group. Then the center of the group can be used instead of a custom object center.
JS:
p = group( pyramid([0,0,30]) );
p.spin = [0,45];