Suica drawings are 2D images generated directly in Suica, instead of being loaded from JPEG or PNG files. Usually drawings are applied onto 2D and 3D objects as textures. Suica drawings are based on a simplified subset of Canvas2D commands.
Table of contents
Introduction
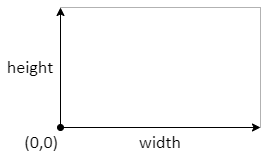
Suica drawings are created on a rectangular drawing canvas. The origin of the coordinate system of a drawing i.e. point (0,0) is at the bottom left corner of the canvas. The X axis extends to the right, Y extends to the top. All coordinates are measured in pixels.
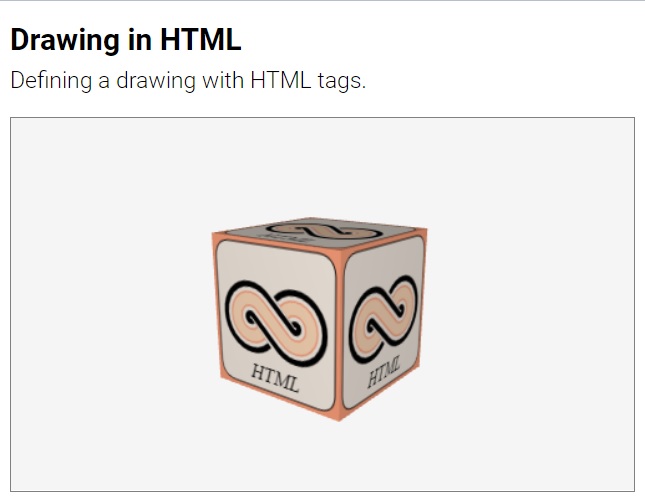
Following the main principles of Suica, a drawing can be created entirely in HTML or entirely in JavaScript. Usually HTML is used for static drawings, while JavaScript is used for both static and dynamic drawings. The other difference between HTML and JavaScript drawings is that in HTML names of commands are case-insensitive and parameters can be freely omitted or rearranged. In JavaScript, however, there is no need to type the names of the parameters. The following two examples demonstrate the same drawing generated in HTML and in JavaScript.

Using drawings in Suica is a three-step process:
- Step 1. Prepare a drawing canvas
- Step 2. Draw shapes or text
- Step 3. Apply it onto an object
Starting a drawing
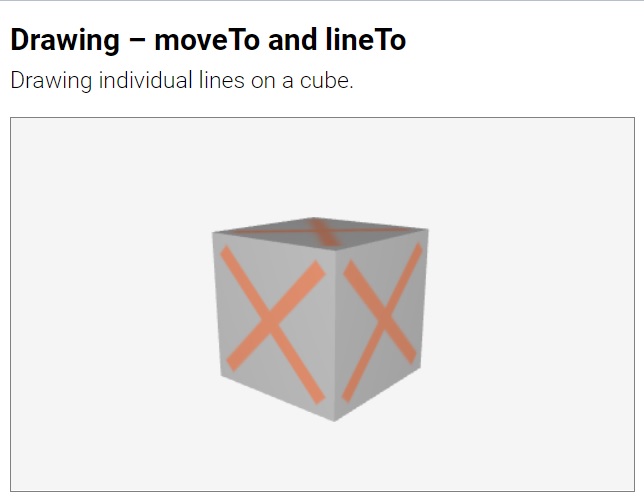
A drawing is created with the drawing command and then it is possible to draw shapes and text in it. The drawing canvas is cleared with clear command to remove all drawn shapes.
drawing
HTML:
<drawing id="name" size="width,height" color="color">
JS:
name = drawing( width, height, color );
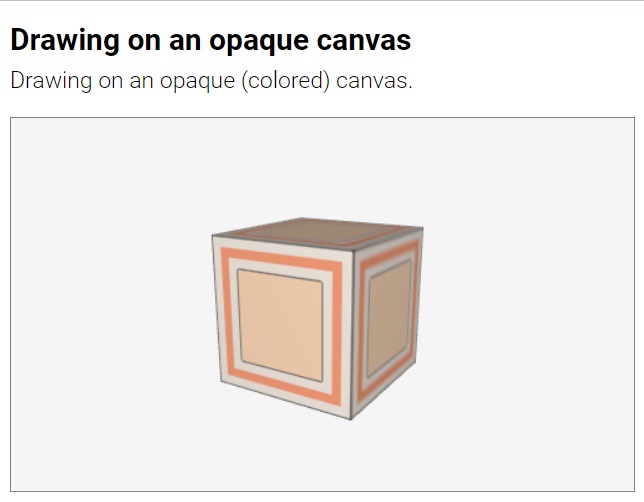
Command. Creates a drawing canvas. Parameters width and height set the canvas size in pixels. By default it is 32×32 pixels. If height is omitted, its is the same as width. Parameter color sets the background color of the canvas. If color is omitted, the background is transparent – i.e. when the drawing is mapped onto an object, the background areas will be transparent.
HTML:
<drawing id="a">
<drawing id="b" size="32,48">
<drawing id="c" width="32" height="48">
JS:
a = drawing( );
b = drawing( 32 );
c = drawing( 32, 48, 'crimson' );
The following examples demonstrate transparent versus non-transparent drawing canvases.
![]()
The actual drawing
The actual drawing of shapes and texts in a drawing depends on how it is created. If a drawing is created in HTML, the drawing commands are placed as subtags in the main <drawing> tag.
HTML:
<drawing id="a" width="100" height="100" color="lightsalmon">
   <moveTo point="10,10">
   <lineTo x="90">
   <lineTo y="90">
   <lineTo x="10">
   <lineTo y="10">
   <fill color="linen">
   <stroke color="black" width="1">
</drawing>
If a drawing is created in JavaScript, the drawing commands follow the drawing command.
JS:
var a = drawing( 100, 100, 'lightsalmon' );
moveTo( 10, 10 );
lineTo( 90, 10 );
lineTo( 90, 90 );
lineTo( 10, 90 );
lineTo( 10, 10 );
fill( 'linen' );
stroke( 'black', 5 );
Drawing commands refer to the latest created drawing. If another drawing is used, its name must be set as a command prefix.
JS:
var a = drawing( );
var b = drawing( );

a.moveTo( 10, 10 );
a.lineTo( 90, 90 );
a.stroke( 'black', 5 );

b.moveTo( 10, 90 );
b.lineTo( 10, 90 );
b.stroke( 'black', 5 );
Applying drawings
A drawing is applied to an object via the image property. The scale of a drawing is managed by the images property.
HTML:
<drawing id="a"> ... </drawing>
<cube image="a" images="4,2">
JS:
a = drawing( ... );
b = cube();
b.image = a;
b.images = [4, 2];
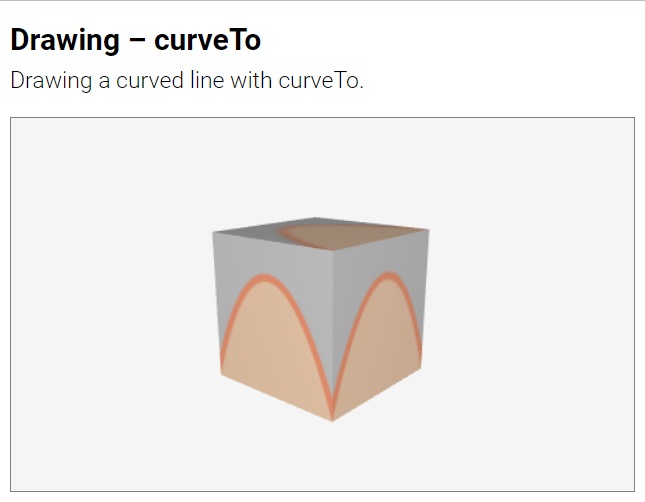
Drawing shapes
The basic way to draw objects in a drawing is to draw outlined or solid shapes.
Defining shapes
A shape is defined with a virtual pen moved along the boundary of the shape. The simplest way to define a shape is to move the virtual pen to the starting point of the shape and then move the pen along its boundary.

Shapes are define with the following commands:
moveTo– moves the penlineTo– adds a line segmentcurveTo– adds a curved segmentarc– adds a circular arc
moveTo
HTML:
<moveTo point="x,y">
<moveTo x="x" y="y">
JS:
moveTo( x, y );
Command. Sets the position of the virtual pen. This command moves the pen from its current location to (x,y) without generating a shape segment. This is used to set the starting point of a shape boundary. By default, both x and y are 0. In HTML point can be split into individual parameters x and y.
HTML:
<moveTo point="10,0">
<moveTo x="10" y="0">
JS:
moveTo( 10, 0 );
Command moveTo has an extended variant with more points. The first point is used for moveTo and the rest points are used for lineTo. These examples:
HTML:
<moveTo point="10,0,20,0,15,10,30,10">
JS:
moveTo( 10, 0, 20, 0, 15, 10, 30, 10 );
are equivalent to:
HTML:
<moveTo point="10,0">
<lineTo point="20,0,15,10,30,10">
JS:
moveTo( 10, 0 );
lineTo( 20, 0, 15, 10, 30, 10 );
lineTo
HTML:
<lineTo point="x,y">
<lineTo x="x" y="y">
JS:
lineTo( x, y );
Command. Adds a line segment to the shape. This command moves the pen along a line from its current location to (x,y) and adds that line to the shape boundary. This is used to define straight segments of the shape. By default, both x and y are 0. In HTML point can be split into individual parameters x and y.
HTML:
<lineTo point="10,0">
<lineTo x="10" y="0">
JS:
lineTo( 10, 0 );
Command lineTo has an extended variant with more points, so that several consequitives lineTo commands can be merged ino one lineTo. These examples:
HTML:
<lineTo point="10,0,20,0,15,10,30,10">
JS:
lineTo( 10, 0, 20, 0, 15, 10, 30, 10 );
are equivalent to:
HTML:
<lineTo point="10,0">
<lineTo point="20,0">
<lineTo point="15,10">
<lineTo point="30,10">
JS:
lineTo( 10, 0 );
lineTo( 20, 0 );
lineTo( 15, 10 );
lineTo( 30, 10 );

curveTo
HTML:
<curveTo m="mx,my" point="x,y">
<curveTo mx="mx" my="my" x="x" y="y">
JS:
drawing.curveTo( mx, my, x, y );
Command. Adds a curved segment to the shape. This command moves the pen along a curved line from its current location to (x,y) and adds that curve to the shape boundary. The line is quadratic curve and is attracted towards point (mx, my), which is defined by the first pair of parameters of curveTo. By default all coordinates mx, my, x and y are 0. In HTML point can be split into individual parameters x and y; and m can be split into mx and my.
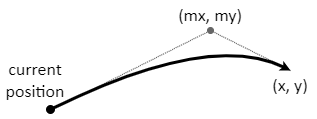
HTML:
<curveTo m="10,0" point="20,15">
<curveTo mx="10" my="0" x="20" y="15">
JS:
curveTo( 10, 0, 20, 15 );
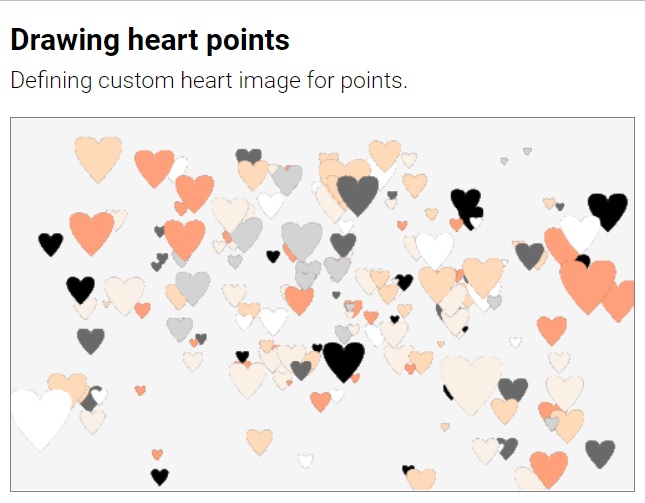
Complex shapes can be constructed by joining individual curves. The shape of a heart in the following example is composed of 6 connected curves.

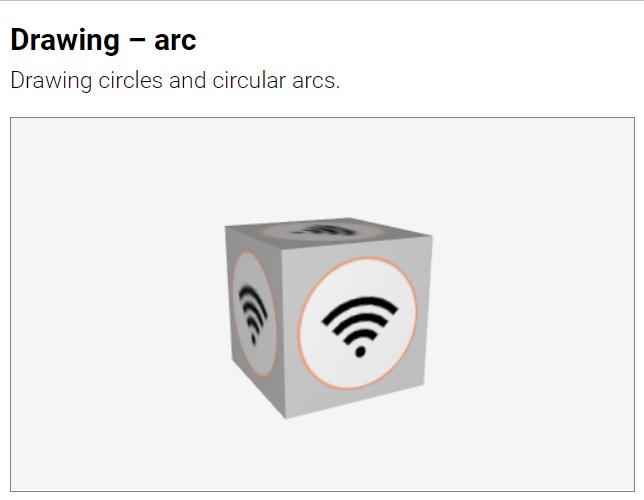
arc
HTML:
<arc point="x,y" radius="number">
<arc point="x,y" radius="number" from="fromAngle" to="toAngle" cw="true/false">
JS:
arc( x, y, radius );
arc( x, y, radius, fromAngle, toAngle, cw );
Command. Adds a circular arc to the shape. This command creates an arc of a circle with center point (x,y) and given radius. The arc stars from angle from and ends at angle to, both measured in degrees, by default 0 and 360. Parameter cw sets the direction of the arc – either clockwise (if cw is true, this is by default) or counterclockwise (if cw is false). If the angles are omitted, a full circle is generated.
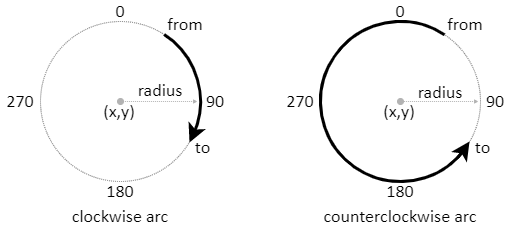
HTML:
<arc point="10,0" radius="5">
<arc x="10" y="0" radius="5" from="0" to="180" ccw>
JS:
arc( 10, 0, 5);
arc( 10, 0, 5, 0, 180, false);
In HTML point can be split into individual parameters x and y. Also in HTML the cw attribute has antagonist attribute ccw. If the values of cw or ccw are omitted, they are assumed to be true. The following commands are equivalent:
HTML:
<arc x="10" y="0" radius="5" cw>
<arc x="10" y="0" radius="5" cw="true">
<arc x="10" y="0" radius="5" ccw="false">
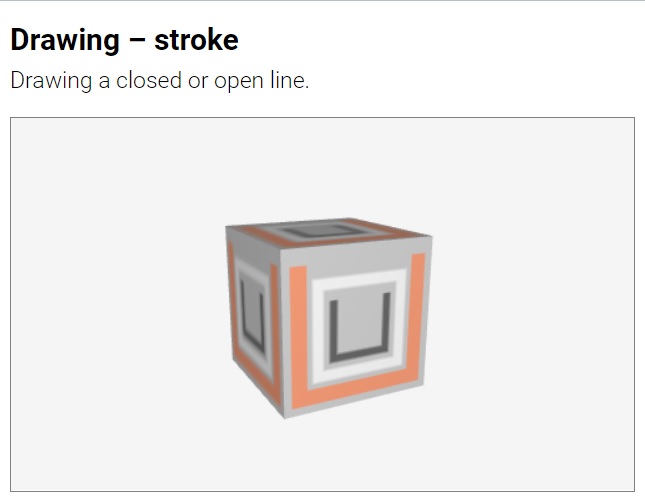
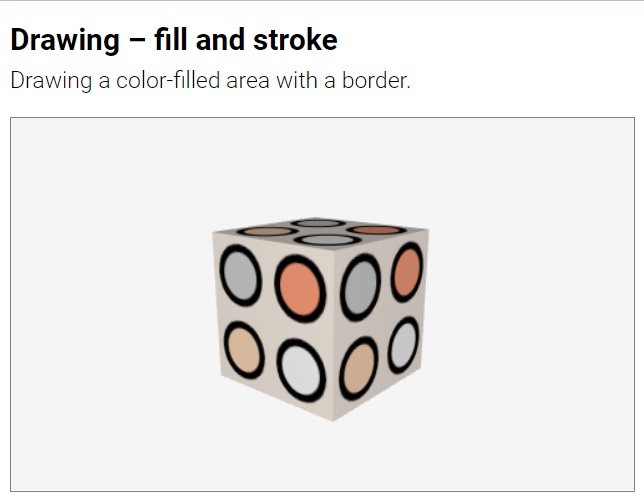
Outlined shapes
The outline of a shape is drawn with stroke.
stroke
HTML:
<stroke color="color" width="width" closed="closed">
JS:
stroke( color, width, closed );
Command. Draws a line around a shape. The line has given color and width (in pixels). If the closed parameter is true, then a line is closed – its end is connected to its beginning. A stroke immediately after another stroke or fill reuses the same shape.
HTML:
<stroke color="crimson">
<stroke color="crimson" width="10" closed>
<stroke color="crimson" width="10" closed="true">
JS:
stroke( 'crimson' );
stroke( 'crimson', 10, true );
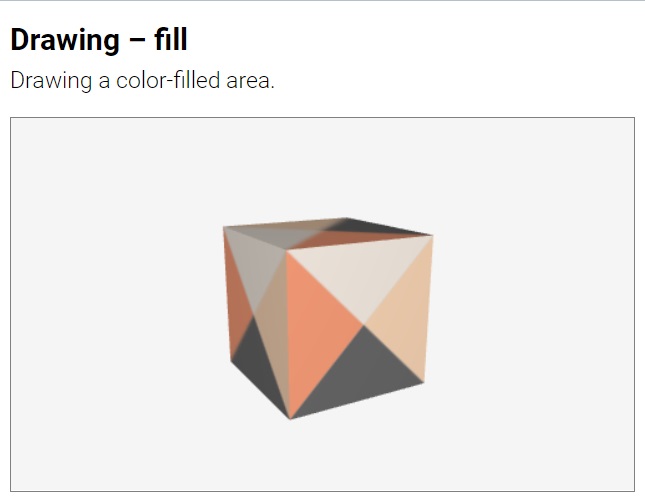
Solid shapes
Solid shapes are drawn by fill.
fill
HTML:
<fill color="color">
JS:
fill( color );
Command. Fills a shape with the given color. A fill immediately after another fill or stroke reuses the same shape.
HTML:
<fill color="crimson">
JS:
fill( 'crimson' );
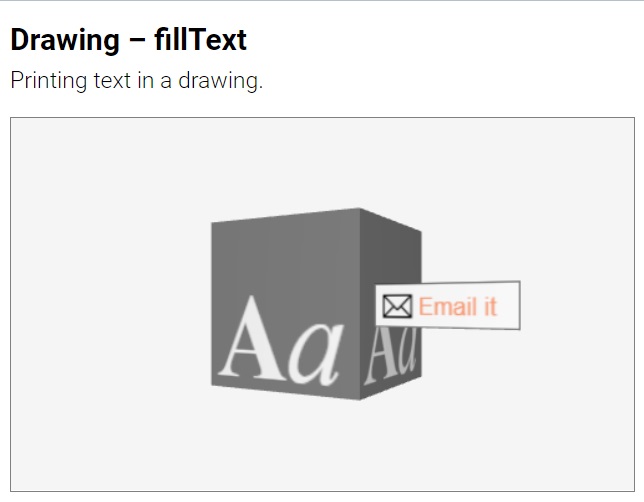
Drawing texts
Drawing texts is done with the fillText command.
fillText
HTML:
<fillText point="x,y" text="text" color="color" font="font">
<fillText x="x" y="y" text="text" color="color" font="font">
JS:
drawing.fillText( x, y, text, color, font );
Command. Draws a text. The text is drawn at given coordinates (x,y) with
given color and font style – a string with a CSS font description (the default font is '20px Arial'). In HTML point can be split into individual parameters x and y.
HTML:
<fillText point="10,5" text="Sample text" color="crimson" font="bold 20px Courier">
JS:
fillText( 10, 5, 'Sample text', 'crimson', 'bold 20px Courier' );
Advanced techniques
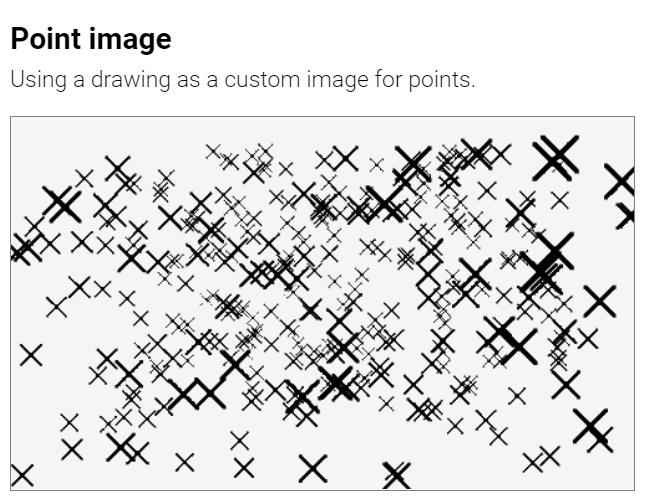
Sprites
Sprites are flat images that always face the user. They are drawn on the screen ignoring any rotation. In Suica sprites are created by applying drawings (and images) onto points.
Dotted and dashed lines
A drawing (or an image) can be applied onto lines or wireframed objects. In this case the drawing provides the color pattern for the segments. If a drawing uses a transparent background, this results in dotted and/or dashed lines.

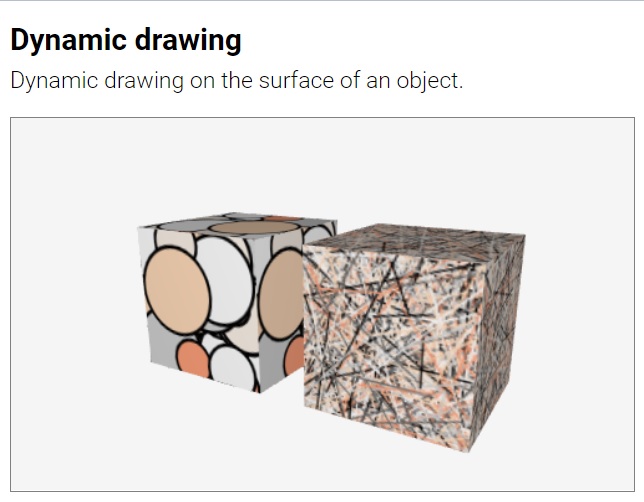
Dynamic drawing
A dynamic drawing is a drawing which images changes in real-time. A Suica drawing can be modified after it is applied to an object. This can be done only in JavaScript by accessing the image property of the object.
JS:
function onTime( )
{
   a.image.arc( 50, 50, random(10,30) );
   a.image.stroke( 'black', 1 );
   a.image.fill( 'white' );
}
In some cases, it is easier to redraw the canvas from scratch. One way to clear the canvas is to define a large shape over it and then fill the shape with a color. This can clear the canvas, but it cannot erase it to transparent. The command clear is the only way to clear the canvas to transparent.
clear
HTML:
<clear>
<clear color="color">
JS:
clear( );
clear( color );
Command. Clears a drawing canvas. The canvas is filled with the given color. If color is omitted, the canvas is completely erased, i.e. cleared to transparent.
HTML:
<clear>
<clear color="crimson">
<clear background="crimson">
JS:
clear( 'crimson' );
The following example demonstrates the use of clear to reset the drawing canvas to a background color or to transparent background.
![]()