mannequin.js
![]()
Mannequin.js
User Guide and API
Този документ е наличен и на български език
- Body parts (Central body parts | Upper limbs | Lower limbs)
- Body posture (Static | Dynamic | Working with postures)
- Other functions (Colors | Body modification | Positioning)
- Using Mannequin.js (CDN | local web server | Nodes.js | API)
Mannequin.js is a simple library of an articulated mannequin figures. The shape and the motion of the figures are done in JavaScript. Here is a short example that shows a male figure live example.
<!DOCTYPE html>

<html>

<head>
   <script type="importmap">
   {
      "imports": {
         "three": "https://cdn.jsdelivr.net/npm/three@0.170.0/build/three.module.js",
         "three/addons/": "https://cdn.jsdelivr.net/npm/three@0.170.0/examples/jsm/",
         "mannequin": "https://cdn.jsdelivr.net/npm/mannequin-js@latest/src/mannequin.js"
      }
   }
   </script>
</head>

<body>
   <script type="module">
      import { createStage, Male } from "mannequin";
      createStage( );
      new Male();
   </script>
</body>
</html>
Body parts
Figure types
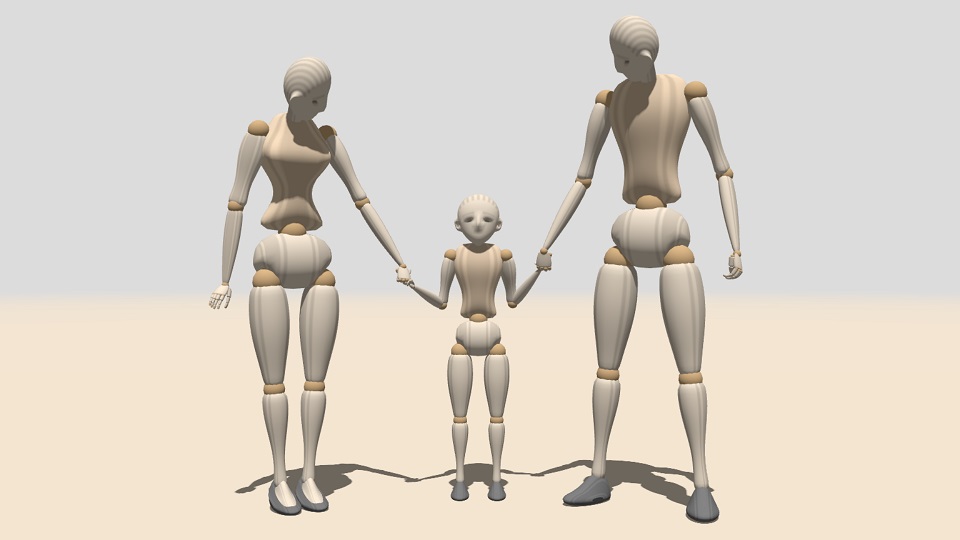
Mannequin figures are created as instances of classes Male(height), Female(height)
or Child(height), where the optional height is the size of the figure in meters.
By default Male has height 1.80, Female has height 1.65 and Child has height
1.15 (live example):
var man = new Male();
    man.position.x = 0.6;
    man.turn = -120;
:
var woman = new Female();
    woman.position.x = -0.65;
    woman.turn = -60;
:
var kid = new Child();
    kid.position.z = -0.18;
:
These three classes have a common predecessor – Mannequin(feminine,height), where the boolean paremeter feminine defines whether the shape is feminine or masculine
(live example):
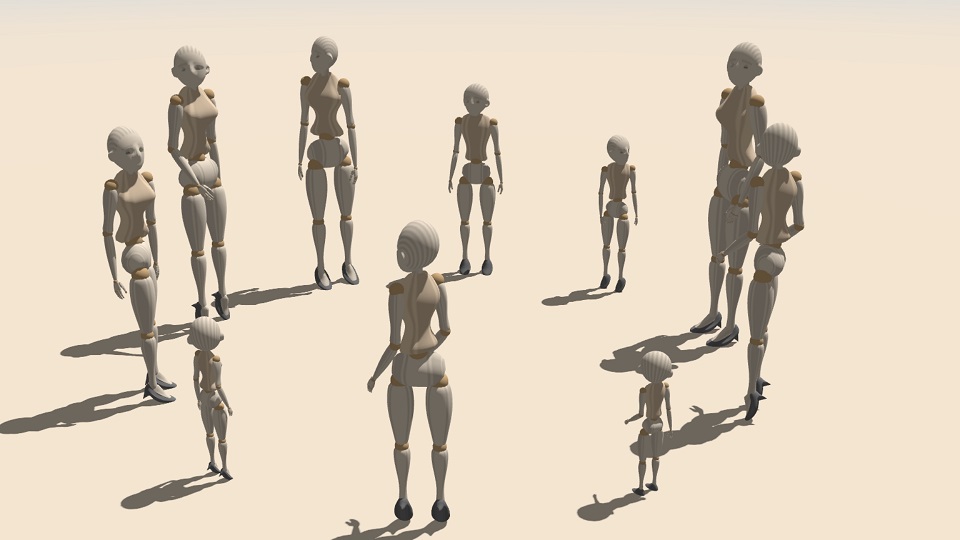
The difference between using different figure classes is that Mannequin sets
a default neutral posture of the figure, while Male and Female set a default
male and female posture.
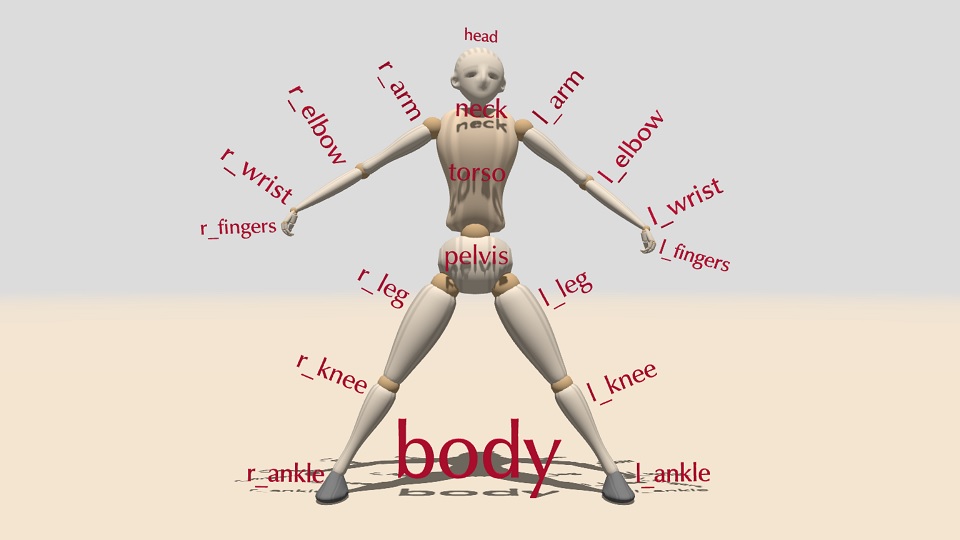
All types of figures have the same structure. For example, the right arm of a figure is named r_arm. For some body parts mannequin.js uses the name of the joint – e.g. the left forearm is named l_elbow. Left and right body parts are always in respect to the figure, not to the viewer (live example):
Each body part has rotational properties that define its position. The values of the rotation properties are angles of rotation in degrees, so 180 is half turn and 360 is full turn. Negative angles are allowed and they represent rotations in the opposite directions.
Mannequin.js has two ways of setting rotations – absolute and relative. When a rotation property is set to a specific value, this produces absolute rotation. The following code will set the forward bend angle of the torso to 45°:
man.torso.bend = 45;
Absolute rotations are considered by some people as counterintuitive. Some joints, like wrists, have three rotational properties (triplets). Due to the nature of rotations in 3D space, rotations in a triplet are interconnected – modifying one property in a triplet often affects the other two. The following code demonstrates how seting the turn property modifies the bend property.
man.torso.bend = 45; // bend=45
man.torso.turn = 45; // turn=45, but now bend≈35.3
Relative rotations are set in respect to the current rotation value of the property. Modifications are much safer, as they do not rely on fixed values. The following code will bend the torso 45° from its current position, and then turn it 45°:
man.torso.bend += 45;
man.torso.turn += 45;
Central body parts
The central body parts are the ones which have single instances – head, neck, torso, pelvis and the whole body as body. To rotate the whole body use properties bend, turn and tilt of the figure’s body or the figure itself (live example):
figure.body.bend = angle;
figure.body.turn = angle;
figure.body.tilt = angle;

figure.bend = angle;
figure.turn = angle;
figure.tilt = angle;
The head supports properties nod, turn and tilt (live example):
figure.head.nod = angle;
figure.head.turn = angle;
figure.head.tilt = angle;
The torso has properties bend, turn and tilt (live example):
figure.torso.bend = angle;
figure.torso.turn = angle;
figure.torso.tilt = angle;
Although the neck is a separate part of the body, it is not controlled individually. Instead, half of the head rotation is distributed over the neck. Similarly, the pelvis is not controlled individually. Instead, the whole body is controlled by bending, turning and tilting.
Upper limbs
The upper limbs are symmetrical body parts: arm, elbow, wrist, fingers and individual fingers finger_0 to finger_4 with their middle phalanges (finger_0.mid to finger_4.mid) and tips (finger_0.tip to finger_4.tip).
Both arms, l_arm and r_arm, support properties raise, straddle and turn (live example). The following list refers to the right arm, however, the same properties are available for the left arm:
figure.r_arm.raise = angle;
figure.r_arm.straddle = angle;
figure.r_arm.turn = angle;
Genrally, rotations of symmetrical body parts retain symmetry. For example, setting straddle to a positive relative angle straddles the left arm to the left, but the right arm – to the right.
The motion of the elbow is only bend (live example). Negative values for angle result in unnatural elbow position.
figure.r_elbow.bend = angle;
The wrists have the same properties as the torso: bend, turn and tilt (live example), but similar to the arms, rotations are symmetrical:
figure.r_wrist.bend = angle;
figure.r_wrist.turn = angle;
figure.r_wrist.tilt = angle;
The last body parts of the upper limbs are the fingers. They are defined as sets (l_fingers and r_fingers) of individual fingers (l_finger_0 to l_finger_4 and r_finger_0 to r_finger_0).
The sets can only bend. Bending of fingers is automatically distributed to bending of their middle phalanges and tips, so use l_fingers and r_fingers to bend the fingers of a hand altogether (live example):
figure.r_fingers.bend = angle;
The individual fingers are numbered from the thumb (0) to the little finger (4). Fingers support properties bend, straddle and turn. The middle phalange of a finger is in its mid property, and the tip is in its tip property. Finger’s mid and tip support only bend (live example and live example).
figure.r_finger_1.straddle = alpha;
figure.r_finger_1.bend = beta1;
figure.r_finger_1.mid.bend = beta2;
figure.r_finger_1.tip.bend = beta3;
Lower limbs
The lower limbs are symmetrical body parts: leg, knee and ankle.
Both legs support properties raise, straddle and turn (live example). Straddling and turning are symmetrical.
figure.r_leg.raise = angle;
figure.r_leg.straddle = angle;
figure.r_leg.turn = angle;
The motion of the knee is only bend (live example). Negative values for angle result in unnatural knee position.
figure.r_knee.bend = angle;
The ankles have the same properties as the wrists: bend, turn and tilt (live example):
figure.r_ankle.bend = angle;
figure.r_ankle.turn = angle;
figure.r_ankle.tilt = angle;
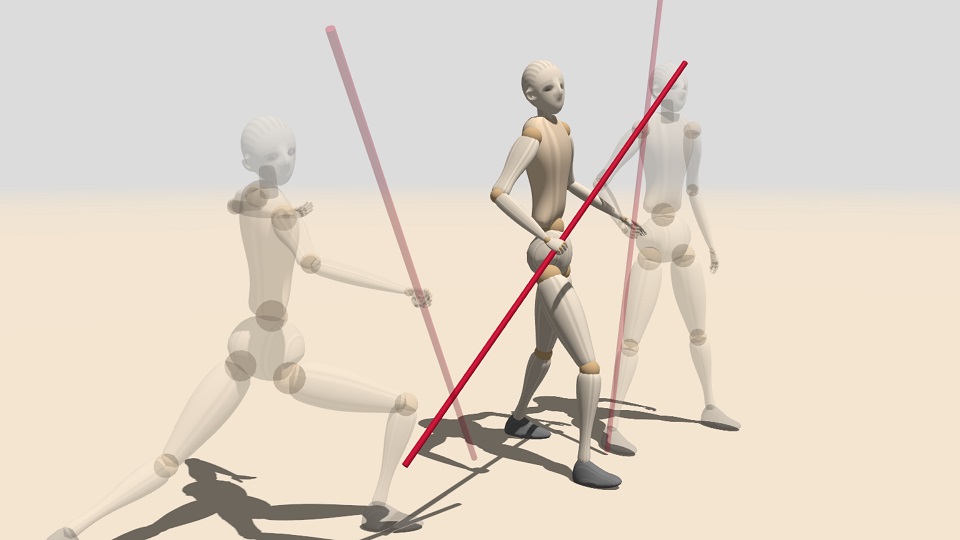
Body posture
The posture of a figure is defined by a setting the rotation properties of body parts. The order of rotations is important, i.e. changing the order of rotations produce different result. The next example applies bending 45°, turning 90° and tilting 60° of three figures. As the order of rotations is different for each figure, the final position is also different (live example):
man.torso.bend += 45;
man.torso.turn += 90;
man.torso.tilt += 60;

child.torso.tilt += 60;
child.torso.bend += 45;
child.torso.turn += 90;

woman.torso.turn += 90;
woman.torso.bend += 45;
woman.torso.tilt += 60;
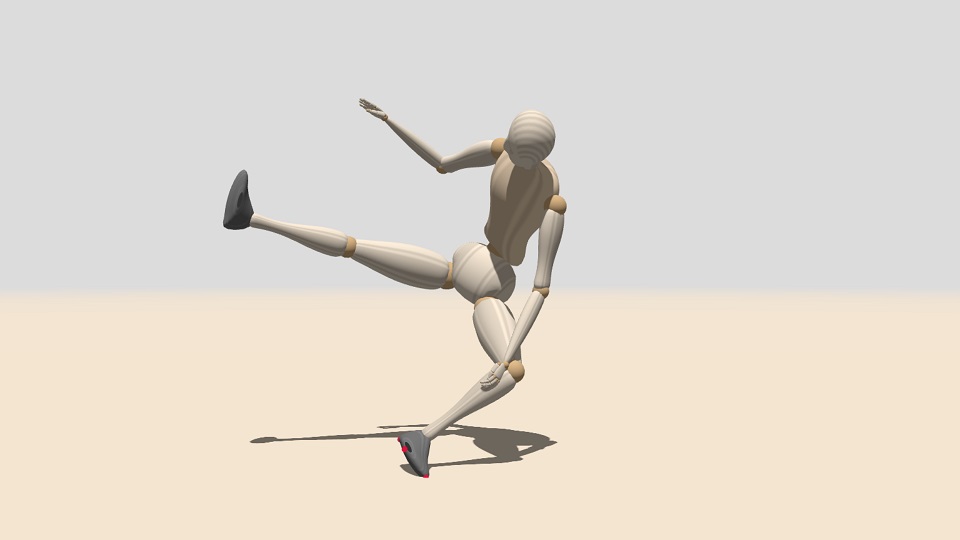
Static posture
The static posture defines the position of body part that do not change. By default, when a figure is created, its body parts are set to the default posture. If the posture editor is not used, all rotations has to be defined programmatically (live example):
Sometimes it is better to define the figure step by step. Tai Chi Chuan posture, shown above, could start by defining the whole body position:
// overall body position
man.body.tilt = -5;
man.body.bend = 15.2;
:
// torso and head
man.torso.turn -= 30;
man.head.turn -= 70;
Then the orientation of the legs can be set:
// right leg
man.r_leg.turn = 50;
man.r_knee.bend = 90;
man.r_ankle.bend = 15;
:
// left leg
man.l_leg.raise = -20;
man.l_knee.bend = 30;
man.l_ankle.bend = 42;
:
Finally, the arms are fixed:
// left arm
man.l_arm.straddle = 70;
man.l_elbow.bend = 155;
man.l_wrist.bend = -20;
:
// right arm
man.r_arm.straddle += 70;
man.r_elbow.bend += 40;
man.r_wrist.turn -= 60;
:
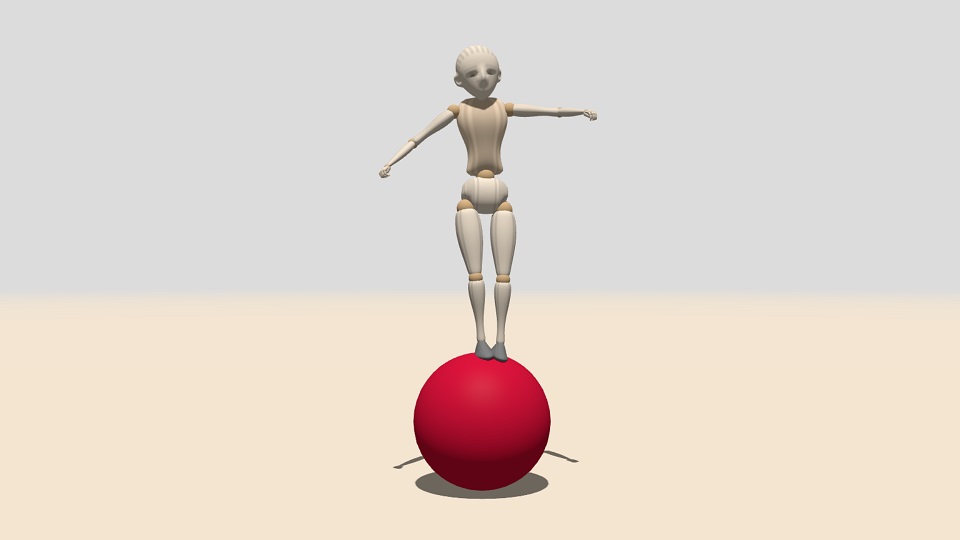
Dynamic posture
The dynamic posture – i.e. a posture that changes over time – is set
with the same properties that are used for static posture. Mannequin.js manages
dynamic posture by a user-defined function called in the animation loop once for
each frame. All changes of a posture should be defined inside this function
(live example). The parameter t is the time, measured
in seconds since the start of the library. The name of the user-defined function
is passed as an argument to createStage().
createStage( animate );

function animate(t)
{
    var time1 = Math.sin( 2*t ),
		time2 = Math.sin( 2*t-60 );

    ball.position.x = 0.06*time1;

    child.position.y = 0.31 + 0.05*Math.cos(time1 * Math.PI/2);

    child.turn = -90-20*time1+20*time2;
    child.tilt = 10*time1;
    :
}
To make the animation loop faster, all constant rotations should be defined outside animate.
Working with postures
A posture could be extracted from a figure with the posture property. It contains an object with fields version for the posture data format version, and data – a nested array for joint angles. The posture property can be used to push a posture to a figure.
{ "version": 7,
  "data": [ [0,0,0], [90,-85,74.8], [16.1,-29.5,26.3], [3.5,-34.8,6.1], ... ]
}
There is alternative postureString property to get or set the posture as a string. Converting the posture to and from a string is done with JSON.stringify and JSON.parse.
Postures could be blended via Euler interpolation (i.e. linear interpolation of
Euler anglеs). The function blend(posture0,posture1,k) mixes the initial
posture0 and the final posture1 with a coefficient k∈[0,1]. When
k=0 the result is posture0, when k=1 the result is posture1, when k
is between 0 and 1 the result is a posture between posture0 and posture1.
The following example blends the posture of one figure
and copies it to another figure
(live example 1 and live example 2):

// two figures
var man = new Male();
var woman = new Female();

// two postures
var A = {"version": 7, "data": [[ 0, -7.2, 0 ],...]};
var B = {"version": 7, "data": [[ 0, 2.8, 0 ],...]};

// set an intermediate posture
man.posture = blend(A,B,0.5);

// copy the posture to another figure
woman.posture = man.posture;
Other functions
Apart for moving body parts, the current version of mannequin.js provides basic functionality for additional modification or accessing the figure.
Custom colors
By default, all figures use a predefined set of colors for body parts.
The colors of a specific figure can be set with the method recolor with 7 parameters that
are Three.js colors or HTML/CSS color names. These colors are for the
head, shoes, pelvis, joints, limbs, torso and nails:
man.recolor(
    'antiquewhite',	// head
    'gray',		    // shoes
    'antiquewhite',	// pelvis
    'burlywood',	// joints
    'antiquewhite',	// limbs
    'bisque',		// torso
	'burlywood'     // nails
);
The color of joints and limbs refers to all joints and all limbs.
Individual colors of body parts are set via the recolor method of each body part (live example):
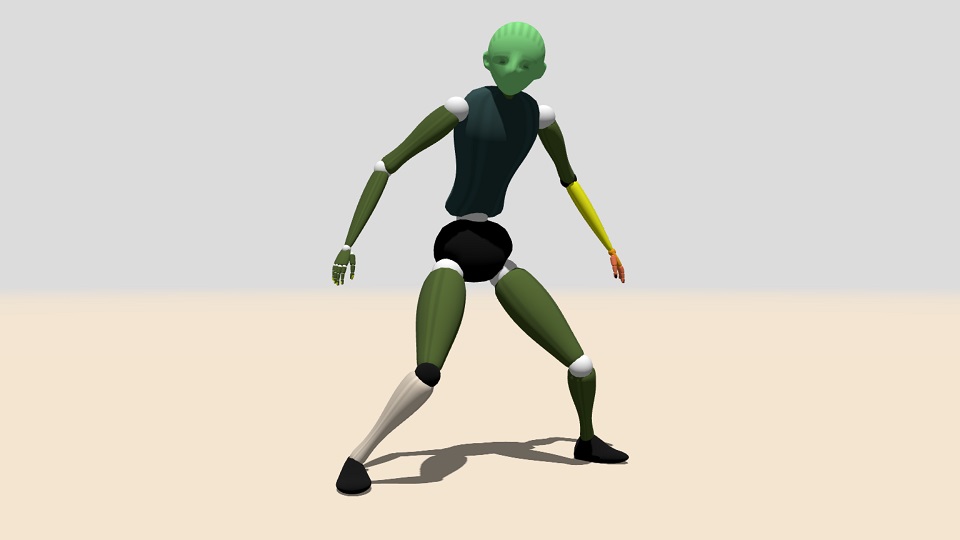
var man = new Male();

// overall colors
man.recolor( 'lightgreen', 'black', 'black', 'white',
           'darkolivegreen', 'darkslategray', 'yellow' );

:
// individual colors
man.l_elbow.recolor( 'yellow', 'black' );
man.l_wrist.recolor( 'orange' );
man.l_fingers.recolor( 'coral' );
man.r_knee.recolor( 'antiquewhite', 'black' );
man.l_nails.recolor( 'black' );
The first parameter of recolor of a body part is the color of the main section
of the body part. The second parameter is the color of the spherical section
(if present).
The tips of the fingers are accessed via l_fingers.tips and r_fingers.tips.
Body modification
Each body part could be hidden. This does not remove the body part and its graphical object from the figure, instead it is just not rendered in the frame. The method to hide a joint from a figure is:
figure.joint.hide();
figure.joint.hide( true );
where joint is the name of the body part to hide. Hidden body parts can still be rotated and this affects the other body parts attached to them. The following example hides both arms and both legs, but they are still preserved internally and used by elbows and knees (live example):
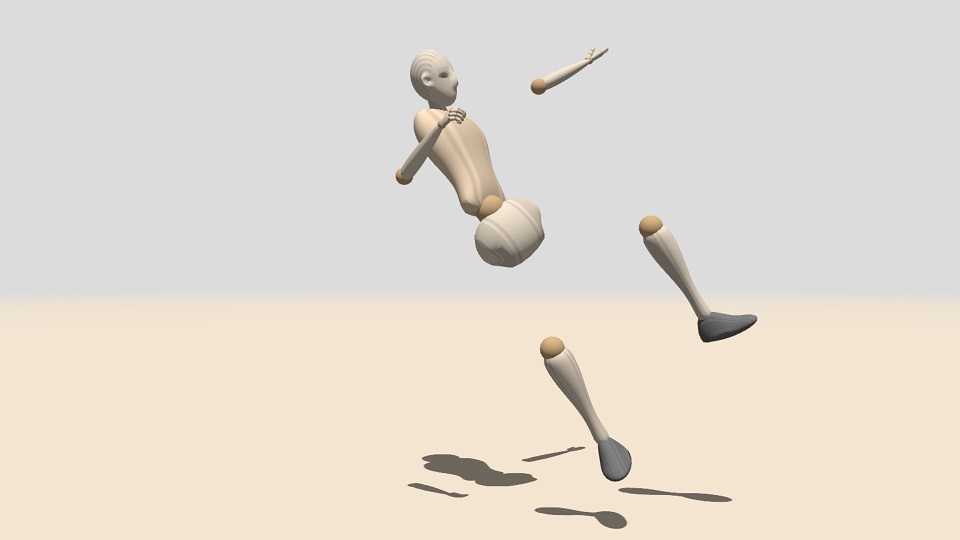
man.l_leg.hide();
man.r_leg.hide();
man.l_arm.hide();
man.r_arm.hide();
If hide is used with parameter true, then hiding is applied to the body part
and all its subparts.
To show a hidden body part use:
figure.joint.show();
figure.joint.show( true );
Body parts are descendants of THREE.Object3D
and support its properties and methods. However, due to the skeletal dependency
and joint attachment, scaling of a body part should be congruent along all axes,
otherwise positions need to be adjusted (live example):

var man = new Male();

man.head.scale.set(3,3,3);

man.l_arm.scale.set(1/2,1/2,1/2);
man.r_arm.scale.set(1/2,1/2,1/2);

man.l_wrist.scale.set(3,5,3);
man.r_wrist.scale.set(3,5,3);
Any custom THREE.Object3D could be attached to a body part. The attached object is included in the body and is subject to any motion the body is doing:
figure.joint.attach(object);
Objects can be attached to hidden body parts, but they are not automatically hidden. This approach is used to replace a body part with entirely custom user object (live example):
var man = new Male();

// adding bracelets
var bracelet = new THREE.Mesh(
    new THREE.CylinderGeometry(3,3,1,16),
    new THREE.MeshPhongMaterial({color:'crimson',shininess:200})
);
bracelet.castShadow = true;
bracelet.position.y = 6;
man.l_elbow.attach(bracelet);

bracelet = bracelet.clone();
man.r_elbow.attach(bracelet);


// replacing the leg with other objects
man.r_leg.hide();

var material = new THREE.MeshPhongMaterial({color:'crimson',shininess:200});

var obj = new THREE.Mesh(new THREE.CylinderGeometry(3,2,3,32), material);
obj.castShadow = true;
obj.position.y = 2;
man.r_leg.attach(obj);
Global position
Not all interaction between figures and other objects can be implemented by
attaching. Mannequin.js provides method point(x,y,z) for each body part. This
method implements forward kinematics
and calculates the global coordinates of the point (x,y,z), defined in the
local coordinate system of the body part.
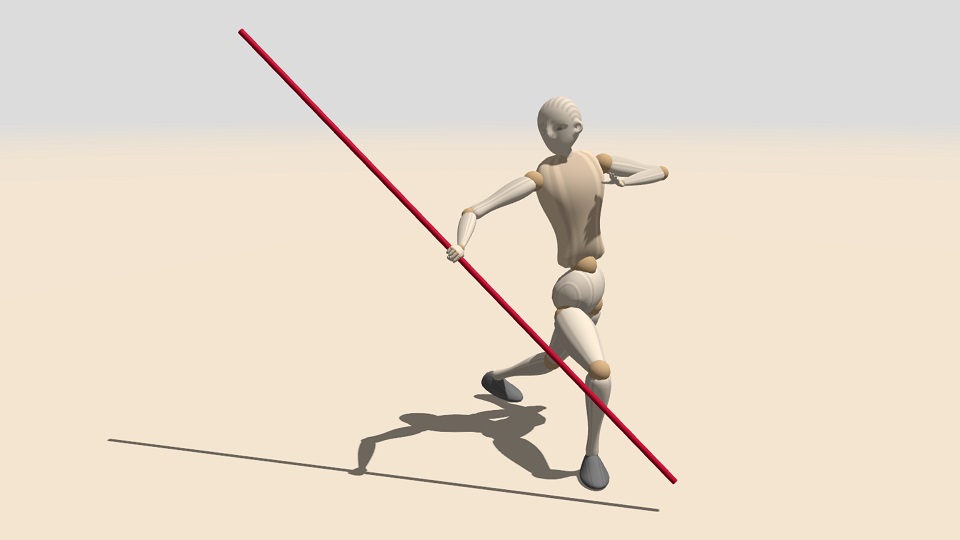
The following example creates a thread going through 5 points relative to body parts of a figure (live example):
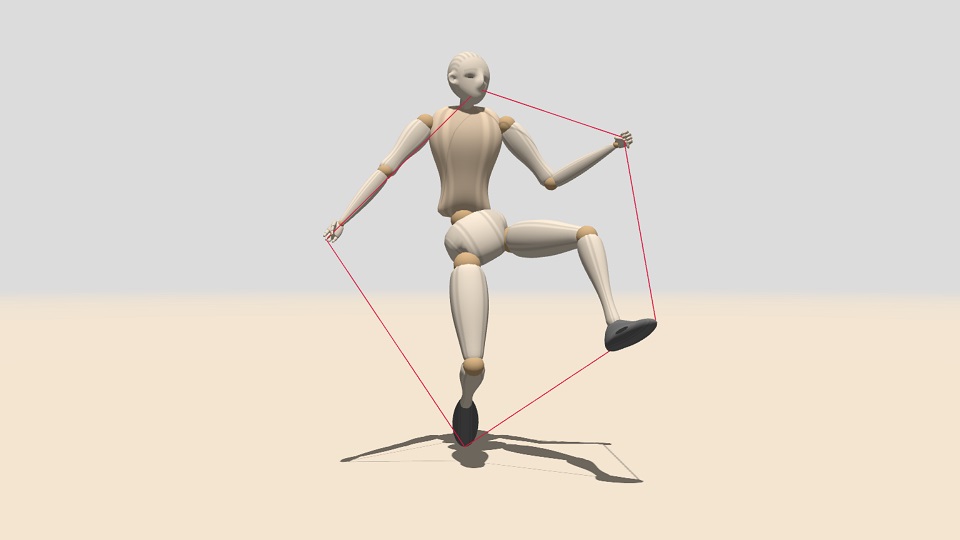
setLoopVertex( 0, man.r_fingers.tips.point(0,1,0) );
setLoopVertex( 1, man.head.point(3,1.2,0) );
setLoopVertex( 2, man.l_fingers.tips.point(0,1,0) );
setLoopVertex( 3, man.l_ankle.point(6,2,0) );
setLoopVertex( 4, man.r_ankle.point(6,2,0) );
Global positions could be used to ground figures – this is to put them down on the ground. However, mannequin.js does not contain any collision functionality, thus the user should pick collision points and use their global position.
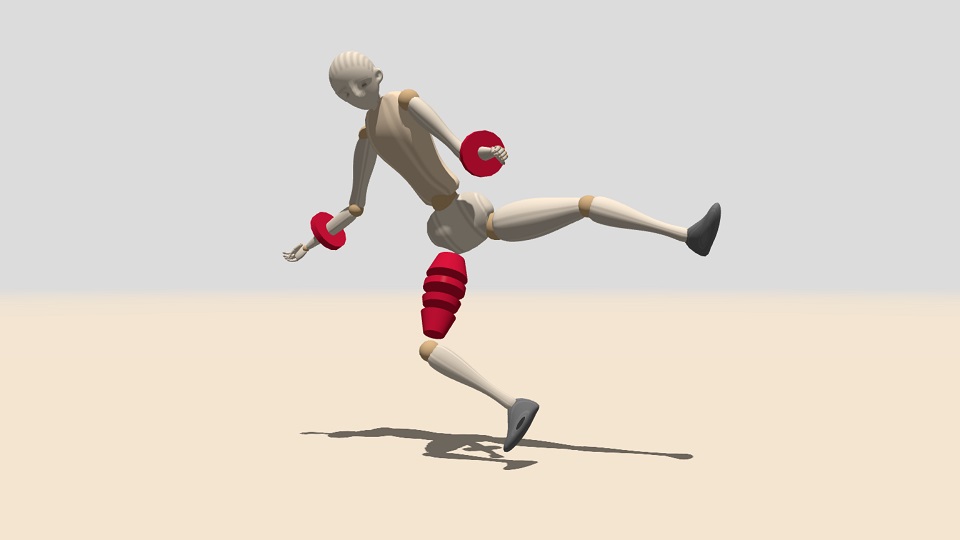
The following example uses four contact points on the left shoe (i.e. man.l_ankle).
The contacts points are shown as red dots. The minimal vertical position of the
contact points is used to adjust the vertical position of the figure
(live example):
// get minimal vertical position of contact points
var bottom = Math.min(
    man.l_ankle.point(6,2,0).y,
    man.l_ankle.point(-2,2.5,0).y,
    man.l_ankle.point(2,2.5,2).y,
    man.l_ankle.point(2,2.5,-2).y,

    man.r_ankle.point(6,2,0).y,
    man.r_ankle.point(-2,2.5,0).y,
    man.r_ankle.point(2,2.5,2).y,
    man.r_ankle.point(2,2.5,-2).y
);

man.position.y += (GROUND_LEVEL-bottom);
The value of GROUND_LEVEL is defined by mannequin.js when createScene() is used.
It contains the vertical offset of the ground.
A figure may use stepOnGround() to move it vertically, so that its lower point
touches the ground.
man.stepOnGround();
Using mannequin.js
The mannequin.js library is provided as a set of JavaScript modules. It is
intended to be used from a CDN. Most likely the library can be installed via
npm, however this is not tested so far.
The library uses Three.js and expects the following import maps to be defined:
three: pointer to the Three.js built calledthree.module.jsthree/addons/: pointer to the path of Three.js addonsmannequin: pointer to the main library file calledmannequin.js
The following subsections demonstrate some possible configuration scenarios of using mannequin.js.
Running from a CDN
CDN stands for Content Delivery Network. Within mannnequin.js a CDN serves as a host of the library files. At the time of writing this document it is recommended to use jsDelivr as CDN. Other CDNs are also available.
The main advantages of using a CDN are:
- there is no need to install mannequin.js
- there is no need to install nodes.js or another JS module manager
- there is no need to install a local web server
- a user file can be directly run in a browser
The main disadvantages of using a CDN are:
- internet access to the CDN is reuqired at program startup
- pointers to Three.js and mannequin.js must be defined as importmaps
A somewhat minimal program that uses mannequin.js from this CDN is shown in this live example. If the file is downloaded, it could be run locally without any additional installation. The importmaps in the example point to specific release of Three.js and to the latest version of mannequin.js.
<!DOCTYPE html>

<html>

<head>
   <script type="importmap">
   {
      "imports": {
         "three": "https://cdn.jsdelivr.net/npm/three@0.170.0/build/three.module.js",
         "three/addons/": "https://cdn.jsdelivr.net/npm/three@0.170.0/examples/jsm/",
         "mannequin": "https://cdn.jsdelivr.net/npm/mannequin-js@latest/src/mannequin.js"
      }
   }
   </script>
</head>

<body>
   <script type="module">
      import { createStage, Male } from "mannequin";
      createStage( );
      new Male();
   </script>
</body>
</html>
Note that many of the examples in this document use the script importmap.js
to generate the import maps and inject them in the page. This is done solely
for maintaining shorter code and to easily switch to other versions of either
Three.js or mannequin.js.
Running via a local web server
It is the same as running from a CDN, a local folder serves as a CDN. The only change is the paths of the import maps should point to local paths.
The main advantages of using only local files are:
- no internet access is required
- no need to install nodes.js or another JS module manager
- protection from a breaking change in the online libraries
- a user file can be directly run in a browser
- user code can use modules and can be split in several files
The main disadvantages of using only local files are:
- mannequin.js and all its source files must be downloaded
- a local web server must be installed
- pointers to local Three.js and mannequin.js must be still defined as importmaps
It is possible to CDN and local usage. For example, using online Three.js and local mannequin.js. This is defined in the paths of the import maps.
Running via nodes.js
The library is provided as a NPM package. If nodes.js is installed on the user machine, it should be possible to install mannequin.js and use it directly.
The main advantages of using nodes.js:
- no internet access is required once the package istallation is done
- no need to use import maps (the whole importmaps section can be omitted)
- protection from a breaking change in the online libraries
The main disadvantages of using using nodes.js:
- nodes.js must be installed
- mannequin.js must be installed
Note: This approach is not tested. If you find that it is not working and you know how to fix it, please get in touch.
API
The library mannequin.js defines the following functions and classes:
createStage(animationLoop)– function, create a stage with ground and lightsgetStage()– function, current stagegetVersion()– function, current version of mannequin.js as a number; e.g. 5.2getPostureVersion()– function, current version of posture data formatgetGroundLevel()– function, vertical position of the ground in metersblend(p,q,k)– function, blended posture of postures p and q with coefficient kMannequin(feminine,height)– class, a general figureMale(height)– class, a male figureFemale(height)– class, a female figureChild(height)– class, a child figure
All figures (instances of Mannequin, Male, Female and Child) have the
same set of properties and methods.
body,pelvis,torso,neck,head– properties, general body partsl_leg,l_knee,l_ankle– properties, body parts of the left legr_leg,r_knee,r_ankle– properties, body parts of the right legl_arm,l_elbow,l_wrist,l_finger_0…l_finger_4,l_fingers,l_nails– properties, body parts of the left armr_arm,r_elbow,r_wrist,r_finger_0…r_finger_4,r_fingers,r_nails– properties, body parts of the right armfeminine– property, a boolean flag of the figure typebend,tilt,turn– properties, body rotationposture,postureString– properties, figure posturestepOnGround()– method, moves the figure vertically to reach the groundrecolor(...)– method, changes the colors of body parts
All body parts have almost the same set of properties and methods. Some rotation properties are not available for all body parts (for biological reasons).
posture– property, posture of the body part (an array of its rotation angles)hide(),show()– methods, shows and hides a body partattach(image),detach(image)– methods, attaches and detaches a custom image to a body partpoint(x,y,z)– method, calculates global coordinates of local position (x,y,z) in respect to the body partrecolor(...)– method, changes the colors of a body partlabel(...)– method, attaches a 3D text to a body partbend,tilt,turn– properties, rotations of ankles, body, torse and wristsbend– property, rotation of elbows and kneesbend,straddle,turn– properties, rotations of fingersraise,straddle,turn– properties, rotations of arms and legsnod,tilt,turn– properties, rotations of head
For finges there are additional properties and methods to manage their structure:
mid– property, the middle phalange of a fingermid.bend– method, rotation of the middle phalangetip– property, the last phalange of a fingertip.nail– property, the nail of a fingertip.bend– method, rotation of the last phalange
The collective properties l_fingers and r_fingers contain:
finger_0…finger_4– properties, individual fingers, corresponding tol_finger_0…l_finger_4andr_finger_0…r_finger_4bend– method, bending rotation of all fingers at once, including middle phalanges and tipshide(),show()– methods, shows and hides all figers